Build a Blog With Hexo
Build a Blog with Hexo
Reference: https://blog.csdn.net/weixin_45019350/article/details/121901433
Some times, I just want to write something and share it. I have built a website of my own from scratch, but that was too lame. So I spent a day with Hexo and found it rather easy.
Step.1 Preparations
1.1 Node.js
Hexo is developed with Node.js, and is managed by npm. You can download Node.js at the official website, and npm is included.
1.2 Git
To make your blog prettier, you may want some extra themes, which usually are in Github. So you got to have Git to download them. Just download zip manually from Github is also OK, I guess. You have two choices, but they may both be a little slow.
Step.2 Install Hexo
With all the preparations done, you are ready to get Hexo, -g is for global.
1 | npm install -g hexo-cli |
Then, you can check installation status by checking its version.
1 | hexo -v |
If you see what you expected, it means you made it.
Don’t get cute to change the default download directory of
npm. If you do so,hexoor other package may not be added to system environment variables correctly. In theory, you can, of course, but it will cause much inconvenience.
Step.3 Build Your Blog
3.1 Initialize Blog
Now, you can build your own blog by a line of simple command.
1 | hexo init "RootFolderName" |
Here, you have to give the root folder name of your blog, and Hexo will create such a folder in current directory, so be careful when you do this. Then, everything of your blog is restricted in this root folder.
Have a look at your root folder, source/ is where your posts will go. themes/ is where your themes will go.
3.2 Install npm
I’m not sure about the meaning of this? But just do this? Enter the root folder first, and then install npm.
1 | ../RootFolderName> npm install |
3.3 Punch It!
Your blog is ready to roll!
1 | hexo generate # static generation |
Now, you will get the default blog at your own computer with a default Hello World passage.
Here are some common command for Hexo. You can use abbreviations, such as hexo g instead of hexo generate.
1 | hexo generate # static generation |
3.4 Post New Passage
Its simple to post a new passage, just one command. It will create a Markdown file at /source/_post/, just go for it and edit with whatever the Markdown editor you like.
1 | hexo new "post name" |
However, in stead of post new posts directly, we recommend you write a draft before you formally publish it. Draft articles will be stored in RootFolderName/source/_drafts/ directory.
1 | hexo draft "post name" |
publish will move draft article into RootFolderName/source/_posts, and do almost the same as new command. In this way, the publish time of the article will be the time you execute publish.
Drafts will not appear in the final blog website.
3.5 Configure Your Blog
Hexo only provide a default configuration, so you have to make your own modification. There is a _config.yml in the root folder, you can configure the global info of your blog here.
For example, the site info. Hexo use moment.js for time matters, so visit https://momentjs.com/ for more information on time.

Err… The default style is… Uhm… Not that pleasing. But don’t worry, you can get plenty of beautiful themes at Hexo’s official site.
You can preview the theme at their example site, and find their Github repository. Usually there is a README.md to tell you how to get it. Each theme has its own _config.yml at themes/"ThemeName", this is only for the theme itself. When you get a theme, configure your theme in the global _config.yml file.
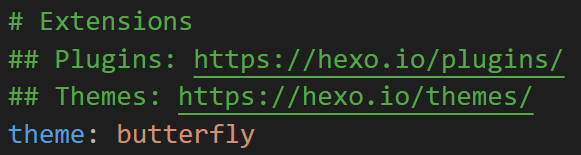
Theme’s configuration file can be found at /themes/"ThemeName"/. Also, you can create _config."ThemeName".yml in the root folder to override the former.
Here, I recommend Butterfly. :butterfly:
Step.4 Deploy Your Blog
What’s the point if the blog can only be viewed on our own computer? So you must be so eager to deploy it. Here I offer two ways, deploy on Github, or on a Windows Server.
4.1 Deploy on Github
To deploy on Github, you need a specific repository first. It must be the format of "username".github.io.
Then, you need a tool to do the push for you. Execute this kind of command under the root folder of your blog.
1 | npm install hexo-deployer-git --save |
Then, configure the deploy type in the root _config.yml.
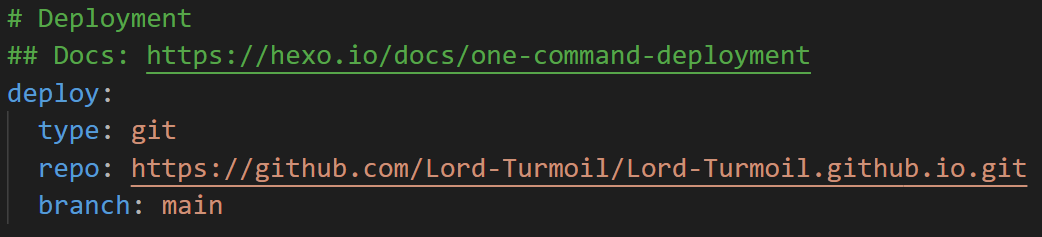
Then, you can use hexo deploy to deploy your website to Github. After successful push, it needs some time before you can visit your blog normally.
4.2 Deploy on Windows Server
Ahh… In fact, this is not quite a method. Just do the step 1 to 3 on your Windows Server. If there is any trouble of network connection to Github, just download stuffs on your own computer, and then paste them to the server. In this case, you can ignore Git, just copy the root folder to your server without any modification. Really, it works.
Below, things are done in your server.
Enter the root folder of your blog, do what you do locally.
1 | hexo clean # clear previously generated files |
Then, the server will start at localhost:4000. And if you want to start at the default port, just use -p parameter.
1 | hexo server -p 80 |
Now, this localhost can be reached by your server’s public IP. This is it, easy, huh?
Troubleshoot
Failed to Load
Q: Why my blog cannot load corresponding resources when deployed to Github?
A: If you find this right after the push, be patient, it takes sometime for Github to initialize your page. But most commonly, the problem is in your configuration.
In the global
_config.yml, findurlentry, change it tohttps://username.github.io, and this will work.
Incorrect Link Behavior
Q: Why the link seems to be recursive? For example, click Tags in Tags page will lead to tags/tags/ page??
A: This is a tricky problem with Hexo itself.
Go to global
_config.yml, changerelative_linkto false.
Post with Images
Q: I want to use images in my markdown file, it displays correctly when I edit my Markdown file, but won’t show up in the blog. How could it happen?
A: Good question. Hexo seems to change the directory of images in Markdown files. So you need some configurations.
The following answer comes from https://blog.csdn.net/xjm850552586/article/details/84101345. Thanks very much!
Step 1: Change default configuration.
In the global
_config.yml, changepost_asset_folderentry totrue. This will make Hexo generate a folder insource/_posts/with the same name of your post, with ‘ ‘ replaced by ‘-‘. You should then put the corresponding image here.If you use Typora, it is recommended to go to
Preferences > Image > When Insert..., chooseCopy image to custom folderand set the folder name to./${filename}.Step 2: Download hexo-image-asset.
Step 3: Modify package.
Then, replace all with the following code. (Code comes from the reference above. Thanks very much!)
2
3
4
5
6
7
8
9
10
11
12
13
14
15
16
17
18
19
20
21
22
23
24
25
26
27
28
29
30
31
32
33
34
35
36
37
38
39
40
41
42
43
44
45
46
47
48
49
50
51
52
53
54
55
56
57
58
59
60
61
var cheerio = require('cheerio');
// http://stackoverflow.com/questions/14480345/how-to-get-the-nth-occurrence-in-a-string
function getPosition(str, m, i) {
return str.split(m, i).join(m).length;
}
var version = String(hexo.version).split('.');
hexo.extend.filter.register('after_post_render', function(data){
var config = hexo.config;
if(config.post_asset_folder){
var link = data.permalink;
if(version.length > 0 && Number(version[0]) == 3)
var beginPos = getPosition(link, '/', 1) + 1;
else
var beginPos = getPosition(link, '/', 3) + 1;
// In hexo 3.1.1, the permalink of "about" page is like ".../about/index.html".
var endPos = link.lastIndexOf('/') + 1;
link = link.substring(beginPos, endPos);
var toprocess = ['excerpt', 'more', 'content'];
for(var i = 0; i < toprocess.length; i++){
var key = toprocess[i];
var $ = cheerio.load(data[key], {
ignoreWhitespace: false,
xmlMode: false,
lowerCaseTags: false,
decodeEntities: false
});
$('img').each(function(){
if ($(this).attr('src')){
// For windows style path, we replace '\' to '/'.
var src = $(this).attr('src').replace('\\', '/');
if(!/http[s]*.*|\/\/.*/.test(src) &&
!/^\s*\//.test(src)) {
// For "about" page, the first part of "src" can't be removed.
// In addition, to support multi-level local directory.
var linkArray = link.split('/').filter(function(elem){
return elem != '';
});
var srcArray = src.split('/').filter(function(elem){
return elem != '' && elem != '.';
});
if(srcArray.length > 1)
srcArray.shift();
src = srcArray.join('/');
$(this).attr('src', config.root + link + src);
console.info&&console.info("update link as:-->"+config.root + link + src);
}
}else{
console.info&&console.info("no src attr, skipped...");
console.info&&console.info($(this));
}
});
data[key] = $.html();
}
}
});