Deploy Hexo on Remote Server
Prologue
It’s been a while since I launched this blog, and now I’ve upgraded my method to deploy it. So here it is, as a record of all these. If you haven’t got your Hexo blog, refer to this passage: Build a Blog with Hexo.
1. Deploy on GitHub
This time, we’re not going to use Hexo’s git deployment. Instead, CI/CD will be applied.
1.1 Initialize Git Repository
To achieve CI/CD, we need two GitHub repository. One for our source code, and the other for the final publish pages. For example, here I got Lord-Turmoil.github.io and Blog.
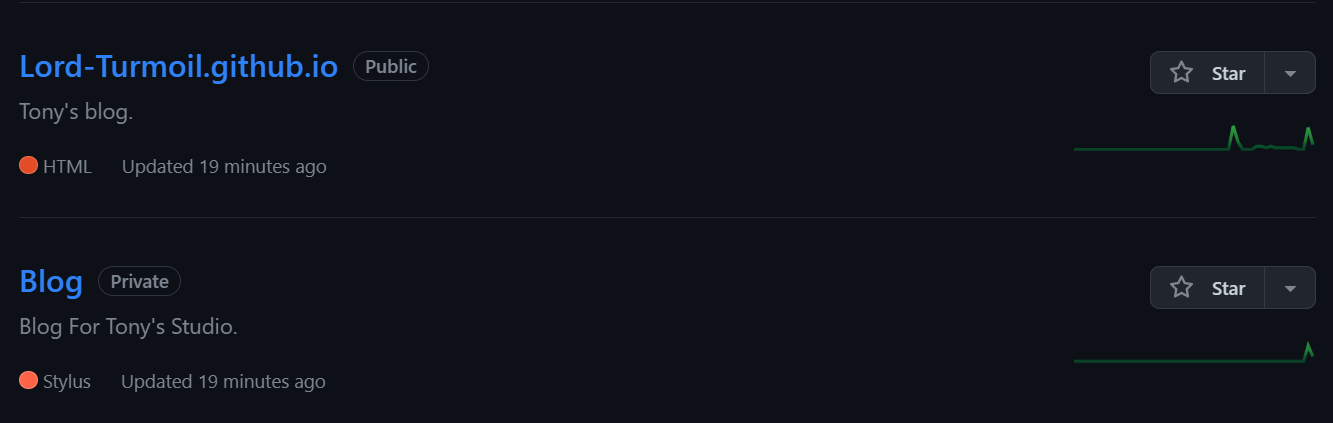
For the final pages, it is recommended to be placed in
${Your GitHub Nickname}.github.iorepository, as it is the default name for GitHub pages. The other can be random, and you can set it private in case other people see your sensitive information in the source code.
Later, when I say “Blog Repo”, I mean source code repository, and “Page Repo” for the so called what github.io repository.
1.2 Add GitHub Action
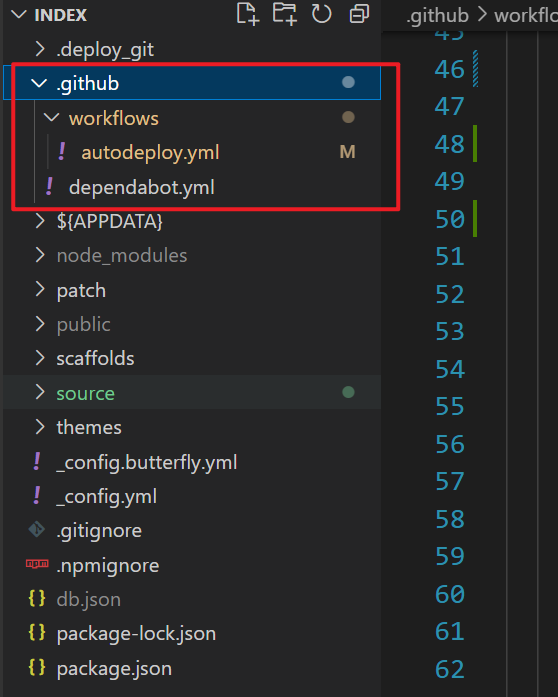
Well, in your Hexo root directory, where _config.yml is located, create .github/workflows/autodeploy.yaml. Don’t care about other files. (But make sure it can work locally using hexo server.) They are post generated.
Then, fill the file with the following code.
1 | name: Auto-Deploy |
For the final Deploy to Github action, just replace token and repository-name with your own Page Repo. Be sure to check all branch entries, because they are most likely to cause errors.
If you want to solve image problem. What’s the problem? You can refer to the troubleshoot part of Build a Blog with Hexo. If so, create file
patch/hexo-asset-image.jsunder Hexo root folder, and copy the following content into it, so that related problems can be fixed.hexo-asset-image.js
2
3
4
5
6
7
8
9
10
11
12
13
14
15
16
17
18
19
20
21
22
23
24
25
26
27
28
29
30
31
32
33
34
35
36
37
38
39
40
41
42
43
44
45
46
47
48
49
50
51
52
53
54
55
56
57
58
59
60
61
62
var cheerio = require('cheerio');
// http://stackoverflow.com/questions/14480345/how-to-get-the-nth-occurrence-in-a-string
function getPosition(str, m, i) {
return str.split(m, i).join(m).length;
}
var version = String(hexo.version).split('.');
hexo.extend.filter.register('after_post_render', function(data){
var config = hexo.config;
if(config.post_asset_folder){
var link = data.permalink;
if(version.length > 0 && Number(version[0]) == 3)
var beginPos = getPosition(link, '/', 1) + 1;
else
var beginPos = getPosition(link, '/', 3) + 1;
// In hexo 3.1.1, the permalink of "about" page is like ".../about/index.html".
var endPos = link.lastIndexOf('/') + 1;
link = link.substring(beginPos, endPos);
var toprocess = ['excerpt', 'more', 'content'];
for(var i = 0; i < toprocess.length; i++){
var key = toprocess[i];
var $ = cheerio.load(data[key], {
ignoreWhitespace: false,
xmlMode: false,
lowerCaseTags: false,
decodeEntities: false
});
$('img').each(function(){
if ($(this).attr('src')){
// For windows style path, we replace '\' to '/'.
var src = $(this).attr('src').replace('\\', '/');
if(!/http[s]*.*|\/\/.*/.test(src) &&
!/^\s*\//.test(src)) {
// For "about" page, the first part of "src" can't be removed.
// In addition, to support multi-level local directory.
var linkArray = link.split('/').filter(function(elem){
return elem != '';
});
var srcArray = src.split('/').filter(function(elem){
return elem != '' && elem != '.';
});
if(srcArray.length > 1)
srcArray.shift();
src = srcArray.join('/');
$(this).attr('src', config.root + link + src);
console.info&&console.info("update link as:-->"+config.root + link + src);
}
}else{
console.info&&console.info("no src attr, skipped...");
console.info&&console.info($(this));
}
});
data[key] = $.html();
}
}
});
1.3 Start CI/CD
Initialize Git repository under Hexo root folder, and add a .gitignore file.
1 | .DS_Store |
Notice that, if your theme uses git, you should first move that
.git/hidden folder under the theme’s directory in case the outer Git repository initialize improperly. After initialization, you can move it back to where it was.
Now, push everything to Blog Repo, and see the magic of CI/CD! 🎉
2. Deploy on Windows Server
2.1 Prepare FTP
Reference: https://hexo.io/docs/one-command-deployment#FTPSync
If we want to deploy our blog on a raw server, we can only use FTP. There are two official FTP plugin of Hexo, here I use SFTP. So first, install the plugin. Notice that this is done under root directory of Hexo.
1 | npm install hexo-deployer-sftp --save |
Then, in your _config.yml, add deploy option. Replace entry with your own. Perhaps you should check your server’s FTP port, and open the corresponding firewall.
1 | deploy: |
2.2 Setup IIS
Well, it’s time to setup your remote Windows server.
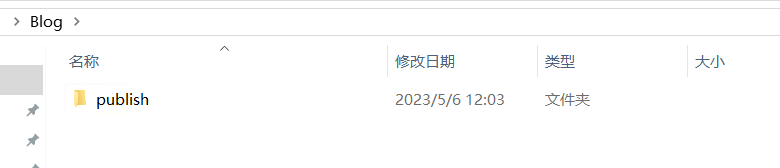
Step 1. Create Physical Path
Create the root folder of your website. Choose your favorite directory and name. 😉 For example, I call it publish. Remember to replace it with your own in the following steps.
Step 2. Add New Website
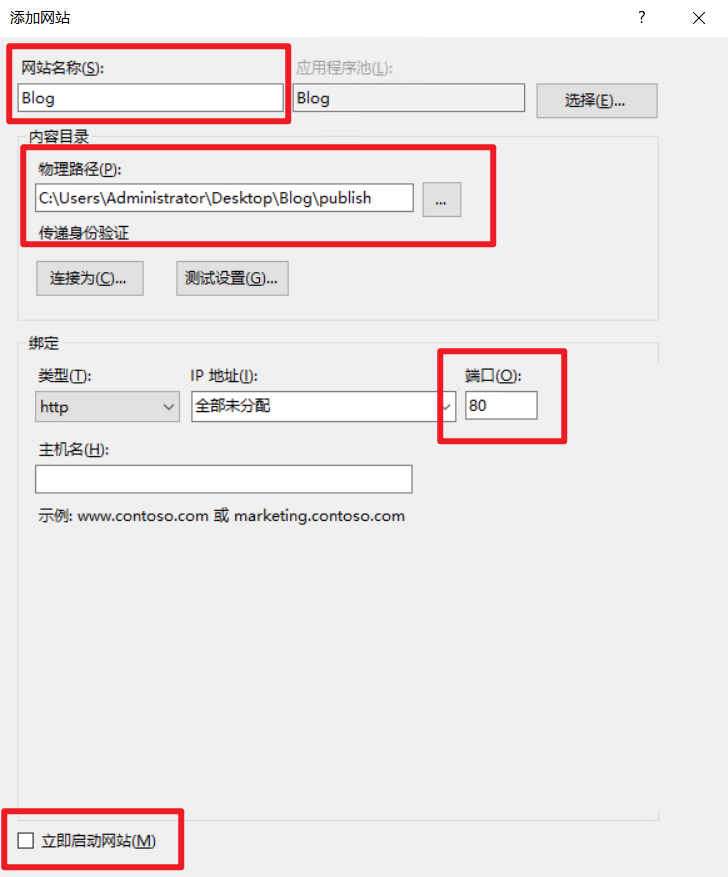
Open IIS server, right-click on ‘Website’, and choose ‘Add Website’.

In the following dialog, just fill the blank I circled. Since our website is not ready yet (an empty folder), we choose not to launch it right now. As for the port, choose it as you will. 80 is the default http port, though.
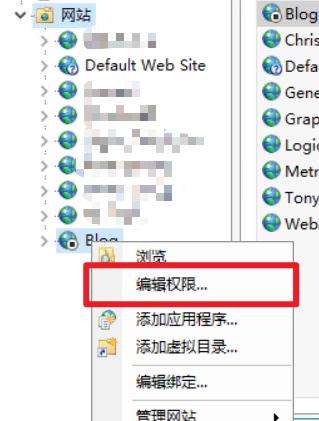
Step 3. Configure Website
Now, our folder cannot be accessed by others due to the default permission. So we here have to edit the permission of our website.
Then in the following dialogs, do things as I marked.
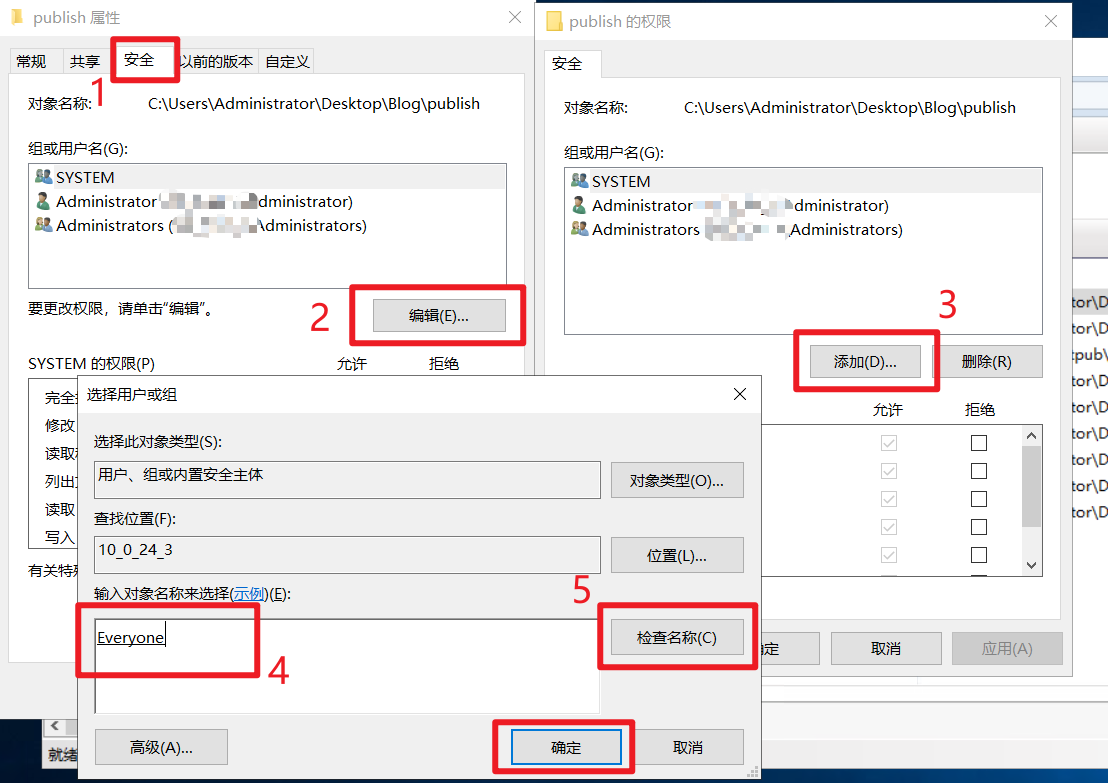
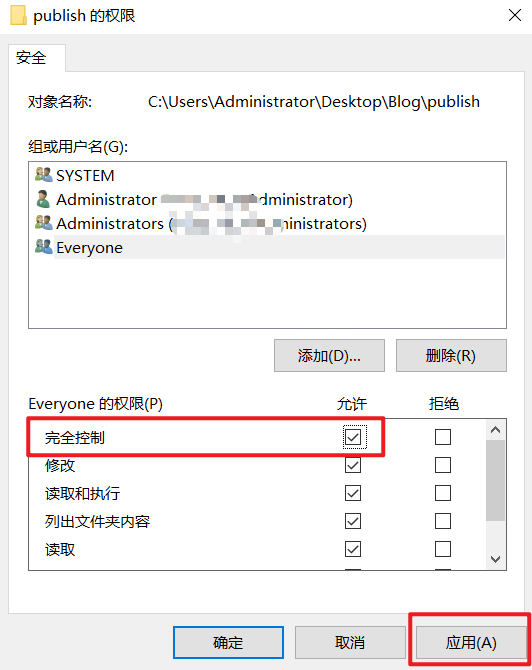
And finally, grant everyone full control of this folder.
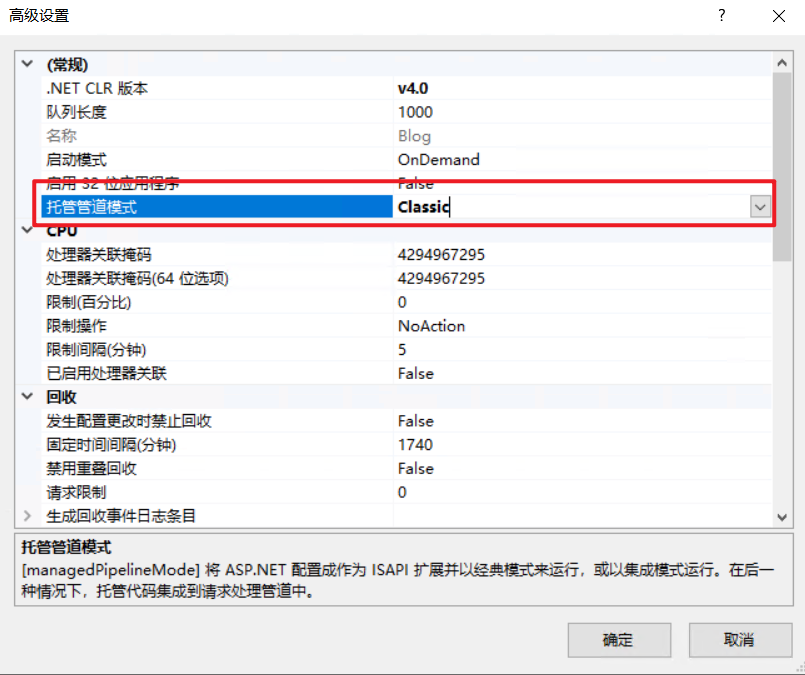
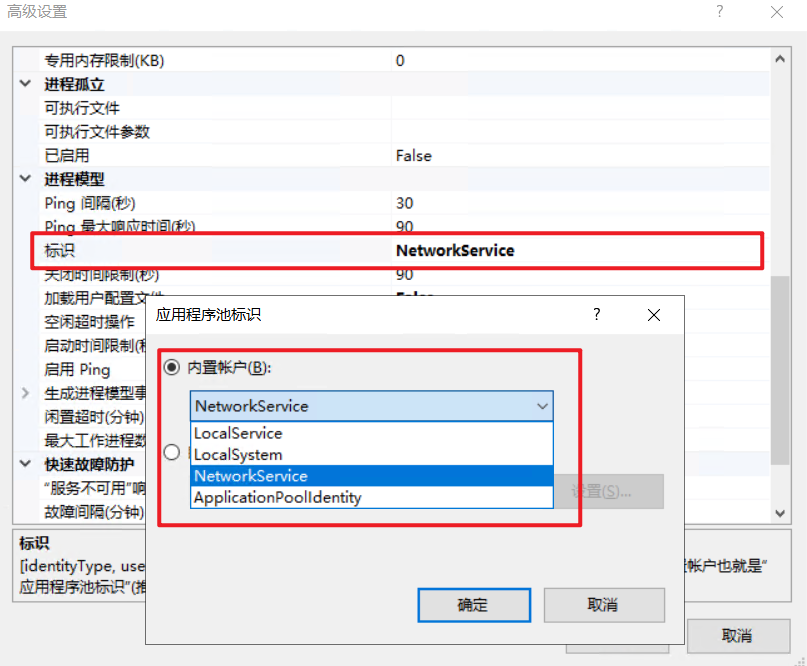
Step 4. Configure Application Pool
Go to ‘Application Pool’, right-click on our pool, and select ‘Advanced Settings’.
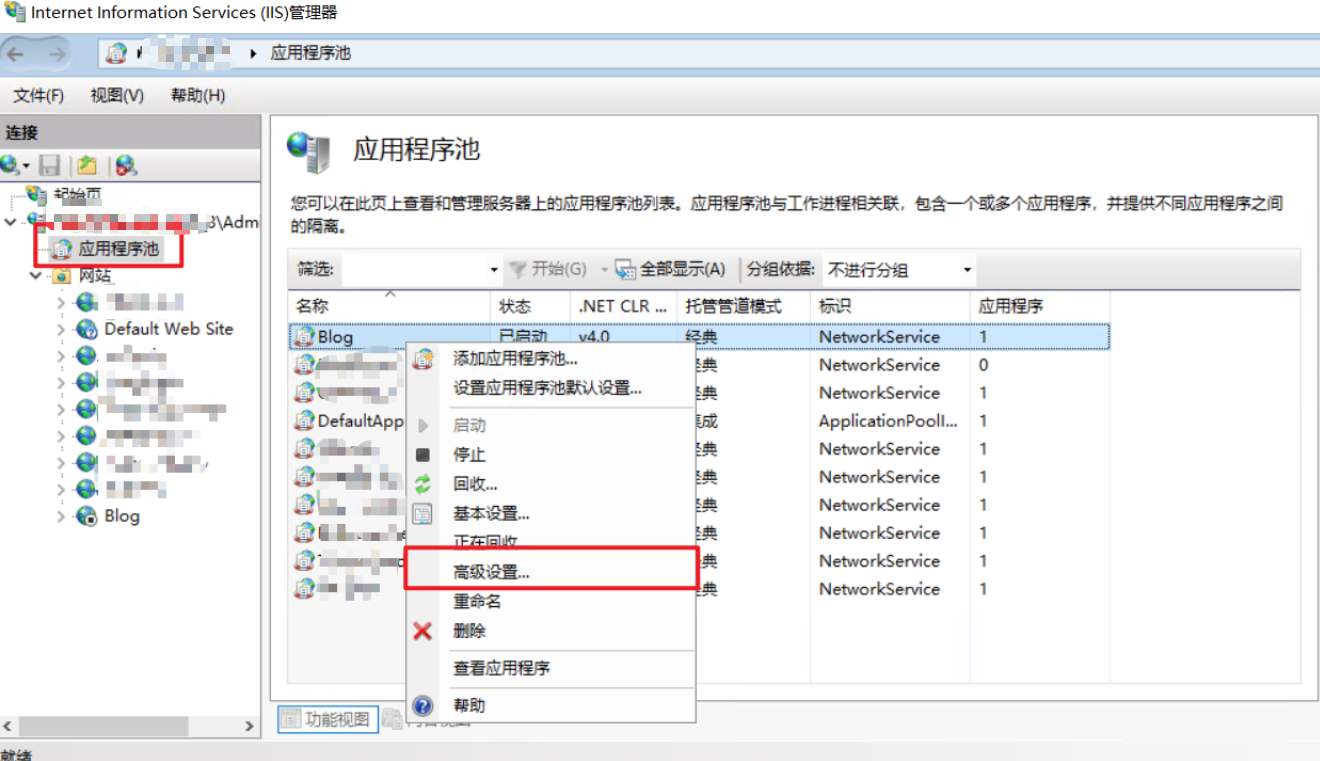
In this screenshot, I already configured the application pool. So you may see different properties.
There are two place to change. Just do as the pictures say.
OK, your IIS is correctly configured. 🥳
2.3 Deploy Your Blog
For FTP deployment, you have to compile the blog locally.
1 | hexo clean |
Then, you will see a public\ folder created, or updated. Actually, the content in this folder is the final pages.
According to Hexo document, you may need to copy the content of the
public\to your server manually the first time you use FTP deployment.Don’t copy
public\directly! Instead, go into it, and copy all subfolders and items to the remote server target directory. Since if you copypublic\folder directly, it will override the permission we set before. 😨
You may ask why not integrate this into CI/CD? Because I find that FTP may not be that stable, and may take too long, or fail in the half way.
Now, execute hexo deploy to transfer public folder to our remote server.
FTP is… not that stable, so it may stuck somewhere. You can be patient, or simple
Ctrl + Cto stop it, and executehexo deployagain. :)
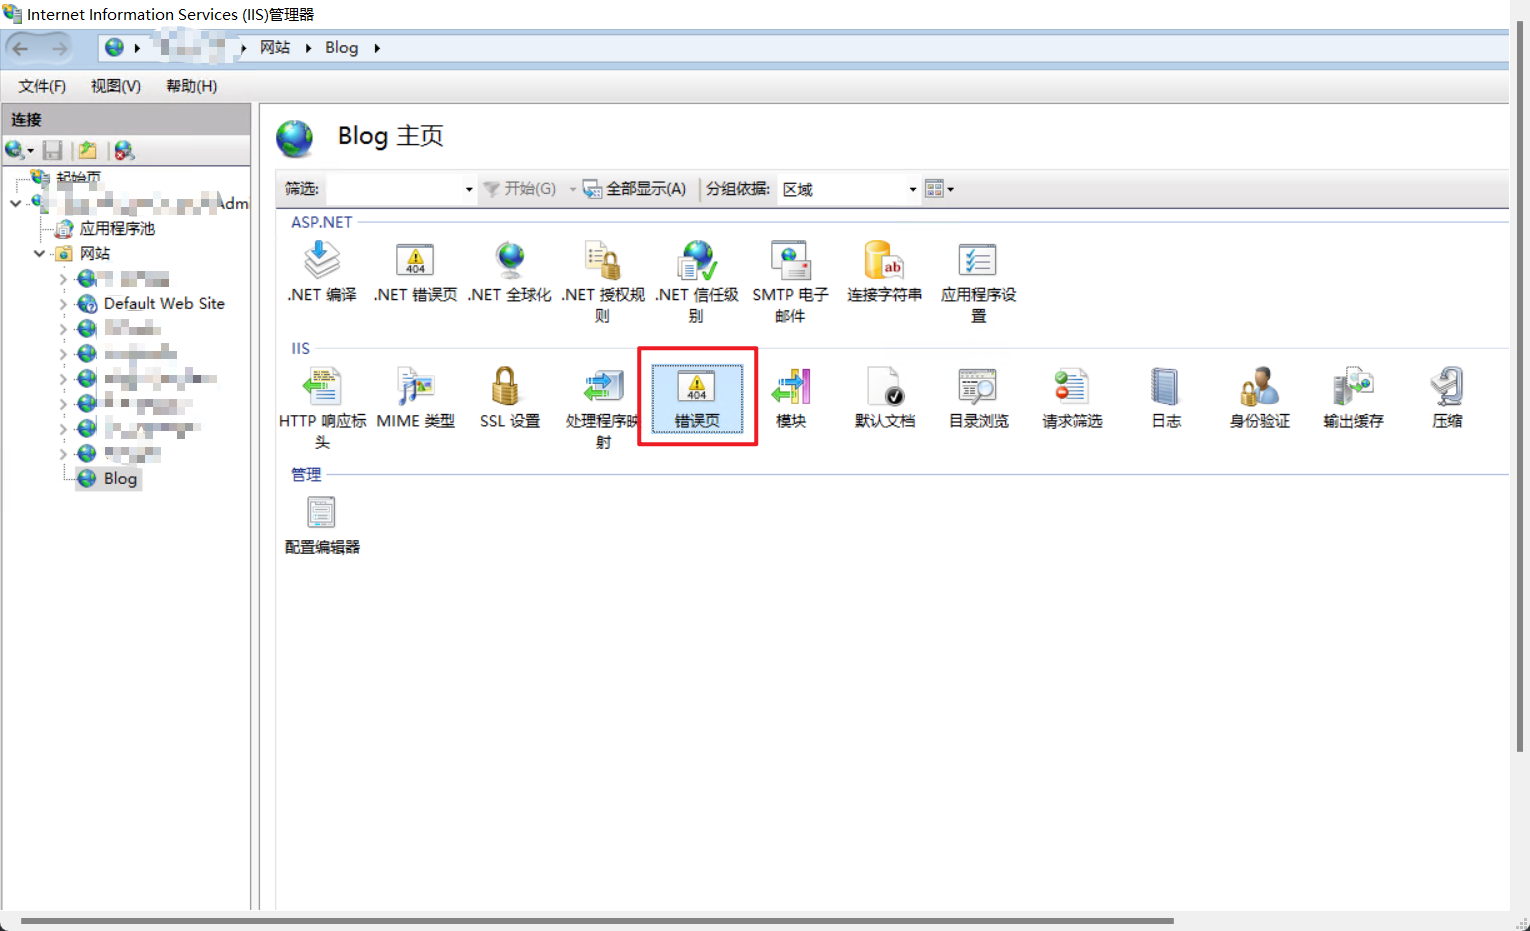
2.4 Configure 404
Since we host our website using IIS, there is one more thing to do - configure 404 page. Especially if your Hexo theme has one.
First, go to IIS, select our website. On the middle panel, double-click on ‘Error Page’.
Then, in the following page, right click on code 404, and set its handling page to our 404.html.
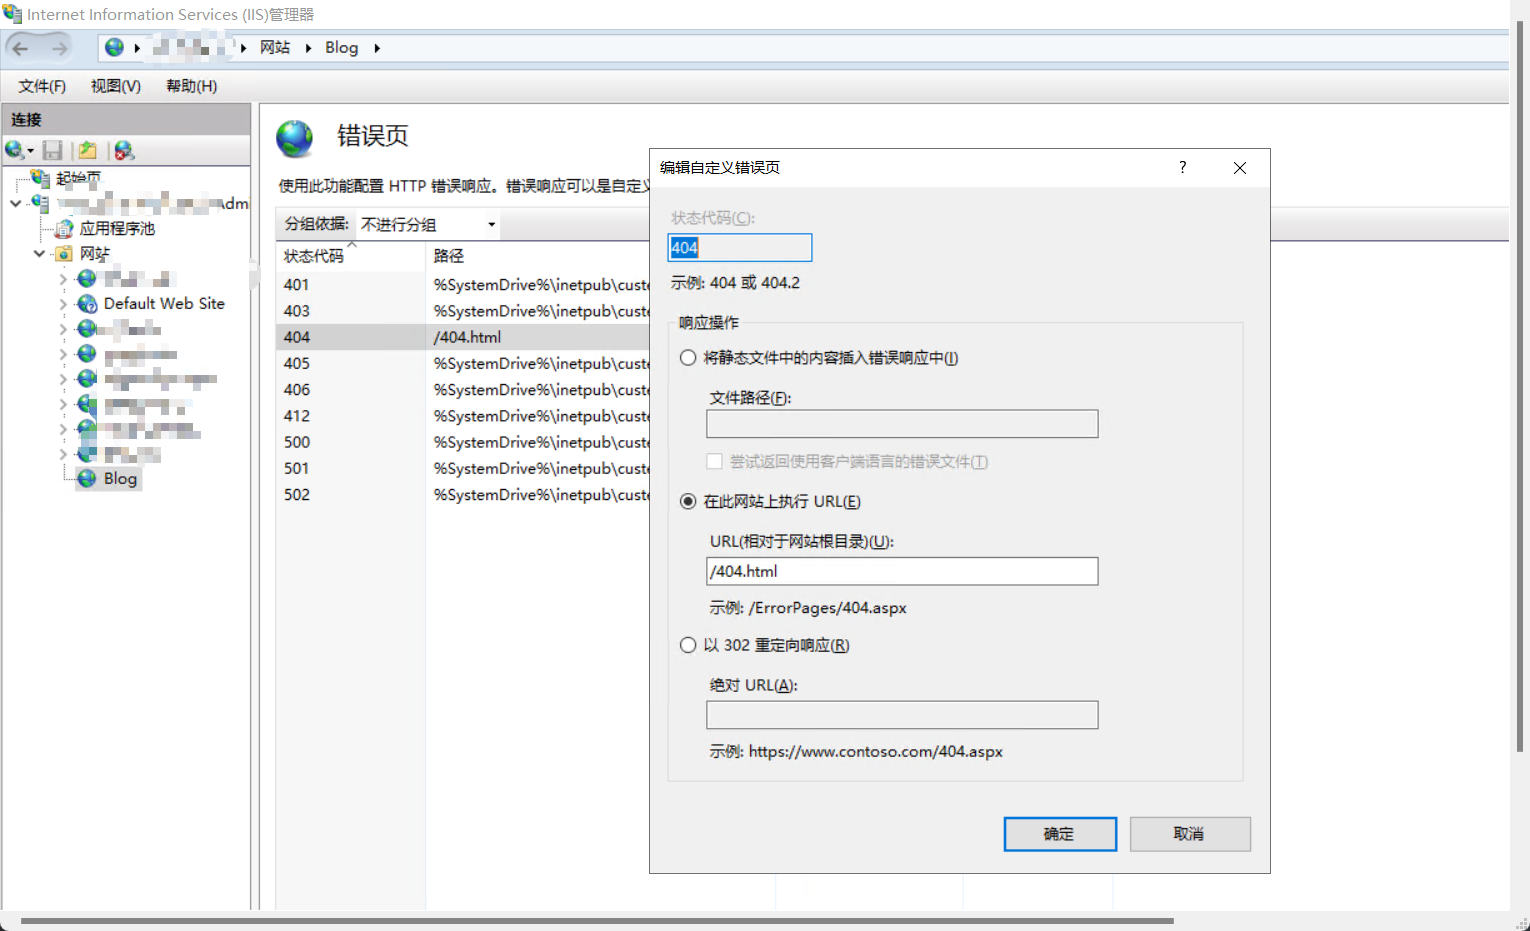
This page depends on your blog. Just find the corresponding 404 page of your own. And remember the leading /, which means the root directory of your website.
Here is my example.
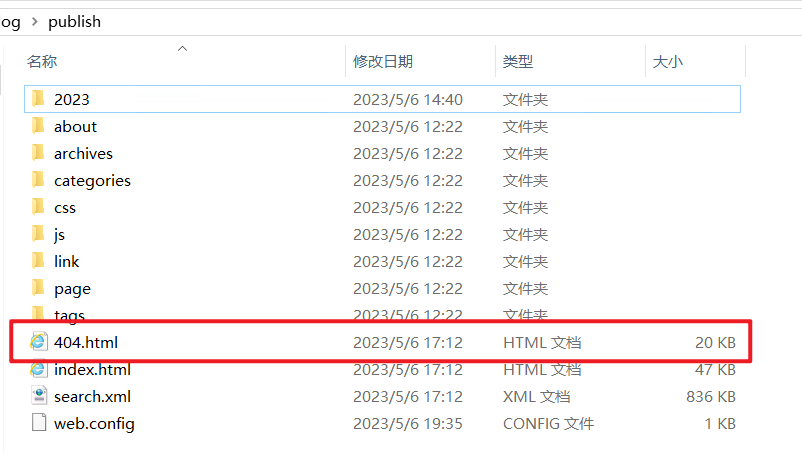
Then, you should find that there’s a new web.config file generated, it stores the custom settings of IIS.
Important! This
web.configdoes not exist on our local machine. Since FTP sync will make remote the same as local, this configuration file will be deleted after that, and our configuration will then lost. So we must copy it to our localpublicfolder so that this file can be properly synced. 😋
2.5 Automatic Batch
If you don’t want to use hexo command every time, or copy web.config each time after a clean, you can use my batch file to do so. It doesn’t have to be hx.bat, rename it anything you like. 😉 And remember to replace all directories with your own. Basic usage is as following.
1 | hx.bat deploy # hexo generate && hexo deploy |
hx.bat
1 | @echo off |
2.6 Troubleshoot
You may encounter some wired error, such as certain file cannot be accessed, as one or more process is using it. This might be caused by FTP service if there are any failure during synchronization. If so, go to resource monitor, and search for the relevant file, then close the related process.
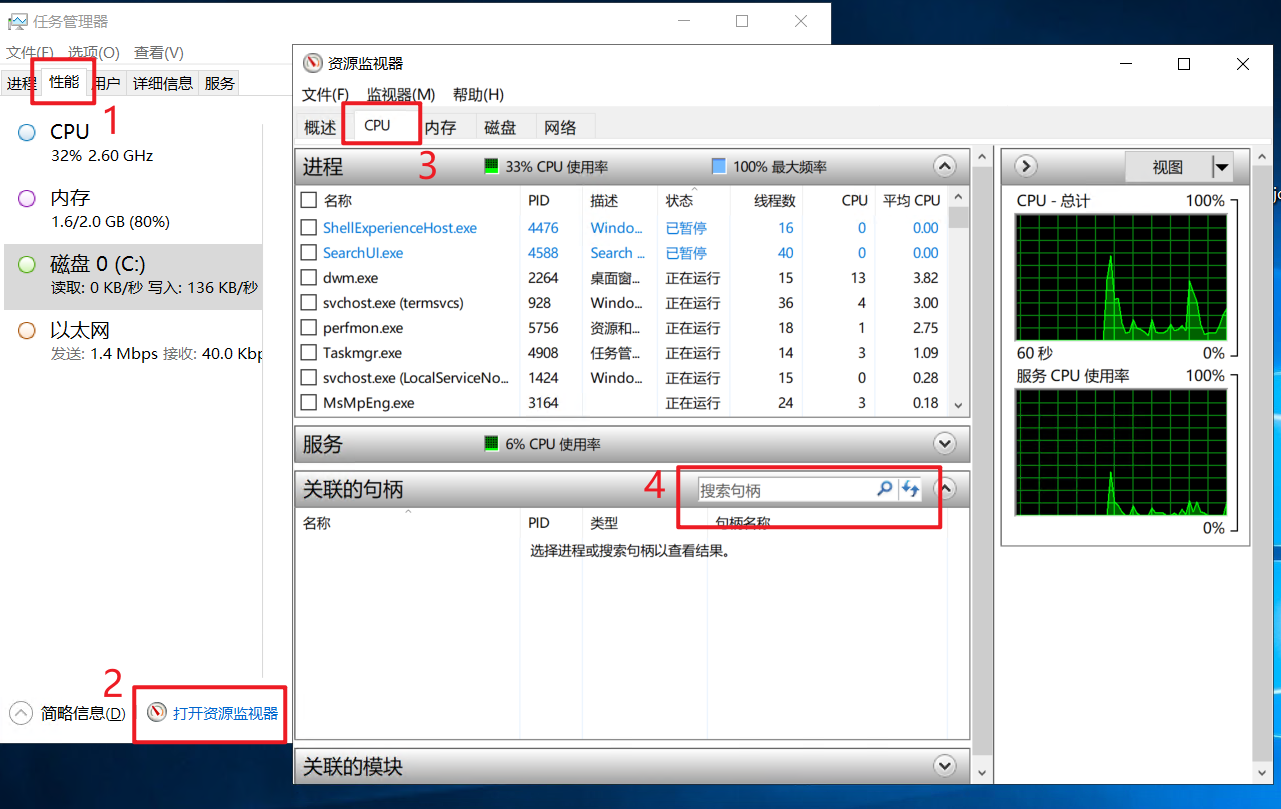
I think the process that cause this problem is related to FTP service. And of course,
explorer.exe(File Explorer) may use this file, too. So, don’t kill our lovely file explore. Stop just other processes. 🥺