Deploy SonarQube on Windows Server
Deploy SonarQube on Windows Server
All information needed can be found at my post Analyze Java with SonarQube and SonarScanner.
By this, you can deploy SonarQube on a remote server, and only deploy SonarScanner locally. Run SonarScanner and get your analysis remotely!
Step.1 Preparations
On your Windows Server, do exactly what you do locally. For more information, just refer to my old post.
Here, I’ll just point out something different.
PostgreSQL Configuration
Server also need restart. :(
When adding new server, password field is required. It is the password of the user, here, it is postgres, the super user.
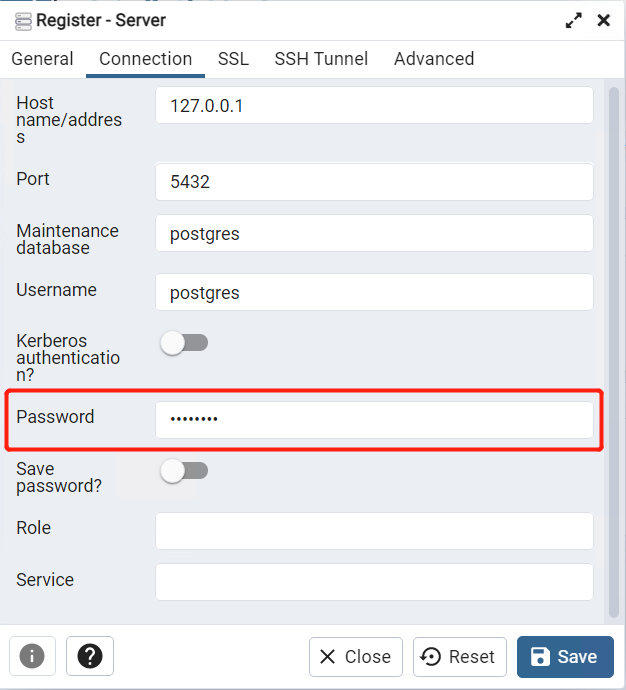
Notice that, if you entered the wrong password, it will say cannot connect the server, rather than wrong password.
Step.2 Launch SonarQube!
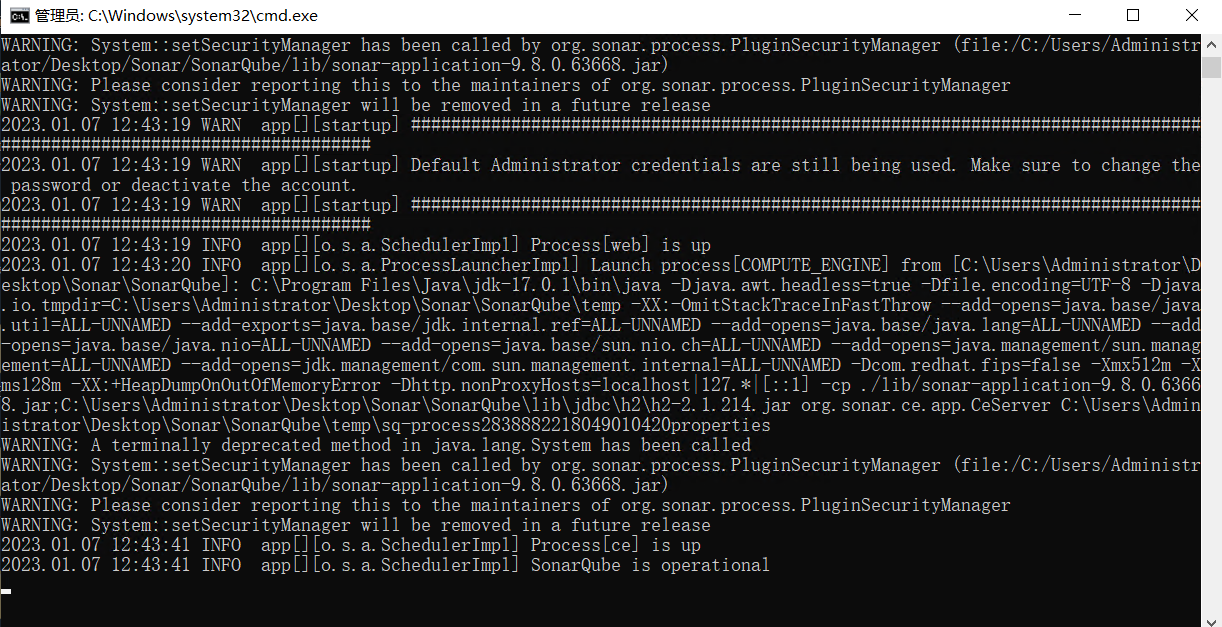
Just do what you did locally, and run StartSonar.bat. It may take quite long on remote server with low performance. It may have a lot of warning, but you can ignore them. If everything goes well, you will get SonarQube fully operational!
And then, you can visit SonarQube remotely! Isn’t it great!
Remember to add firewall rule for port 9000 for your server.
Step.3 Configure SonarQube
3.1 Configure SonarQube
This is done on the remote server.
Well, this remains the same as local configuration.
Add following parameters to the Sonar\SonarQube\conf\sonar.properties.
1 | # Your database |
3.2 Configure SonarScanner
This is done on your local machine.
Well, since SonarScanner is deployed locally, you have to change sonar.host.url to your remote server.
Add following parameters to the Sonar\SonarScanner\conf\sonar-scanner.properties.
1 | # ----- Default SonarQube server |
3.3 Configure Java Project
This is done, of course, on your local machine.
Find your Java project, and create sonar-project.properties in the root directory with the following parameters. Remember to replace parameters with your own.
1 | # must be unique in a given SonarQube instance |
Step.4 Run SonarScanner
Now, you can run sonar-scanner under your Java project folder, and get results on the remote server!
You may get such a warning after a scan. It is because SonarQube failed to connect the PostgreSQL database. Check
Sonar\SonarQube\conf\sonar.properties, and see if the parameters match database settings. Pay attention to username and password.
This is it, and you’re all set! See you around! :)