Modify Shadow Fight 2 Data
“It is never too late to be what you might have been.”
— George Eliot
The method in this post may be OUTDATED, and may not work in the latest version of the game.
Prologue
Shadow Fight 2 is a fantastic action game developed by Nekki. However, some items in game may not be easy to obtain through legal progress of the game, such as coins, gems, and enchantment materials. Also, some special weapons.
My phone is HarmonyOS, which is slightly different from Android and totally not iOS. But I guess they’re all the same. And right now, when I’m writing this article, the game version is 2.26.0.
If you got any problem, feel free to comment below.
DISCLAIMER
- Everything in this tutorial is for self entertainment purpose only.
- You are at risk of losing your progress if I was wrong, or you made mistakes.
Preparation
First, you need the game. Of course, you can download it from official software store. However, if you just want to go through it quickly, you can download it from androeed.ru. It offers you optional unlimited money, which means you can still play it as the original game, and keeps the ability to have much money.
Notice that the game from androeed.ru doesn’t have unlimited enchantment material.
After you get the game, you can just play it and only make modifications when you really want to. And before you do so, you should prepare a text editor that could edit XML files. You can download one on the phone, or exchange files with a PC.
Any modification to the game is done in this directory on your phone: Android/data/com.nekki.shadowfight/. This is the location in HarmonyOS, and may vary in different OS. This directory will be called root folder in the following parts.
You can connect your phone to a PC to make it easier for file operations. But do not launch the game during connection, real-time I/O to the files may cause Windows Explorer to get extremely slow or freeze.
Back up Data
If you are afraid of losing your progress, or encountered some error and need to re-install the game, backing up your data is sure to be a good choice.
Step 1. Files to Back up
Go to the root folder (Android/data/com.nekki.shadowfight/), you will see all data files that Shadow Fight 2 uses.

cache/ and no_backup/ are trivial, you can simply ignore these two.
Now, enter files/, and you will see these, which is what we will back up then.

Here are some brief introductions to these folders.
gamedata/: Game resources, this is essential if you don’t want to re-download them.userdata/: Your progress, MUST be kept intact.Unity/: Shadow Fight 2 uses Unity?! Seems to be some archived logs. Not that vital.il2cpp/: Seems to be an asset comes together with Unity.
Step 2. Back up the Files
Basically, you can just copy the files/ folder to your back up folder. However, this may take quite long, because there are too many files (though small) in files/Unity/!
Good news is that, these annoying files are totally unnecessary! Go to files/Unity/ce8db467-e533-4c3a-8e87-96866484f08b/Analytics/ArchivedEvents, and delete all sub folders, it won’t affect the game.

ce8db467-e533-4c3a-8e87-96866484f08b is the only folder in Unity/, and it may vary in different versions or devices.
Now, you can simply copy the files/ folder to anywhere you want.
Modify Game Data
You are now at risk of losing your progress or corrupting your data! Make sure you have backed up your data!
Unlike other tutorials (or perhaps due to the game version?), you MUST connect to the Internet when open the game, or the game may report data crash!
If you do this on your PC, you can show file extensions to make it easier to identify files.
0. Introduction to Game Data
Before you actually modify the game data, spend some time to get a brief understanding of what you are dealing with.
Go to files/userdata/, and you’ll see your progress and settings data. The game creates corresponding hash files to validate data. If any file failed hash verification, you game will encounter data crash error! Your progress is stored in users.xml. Actually users_backup.xml is useless if you have users.xml.
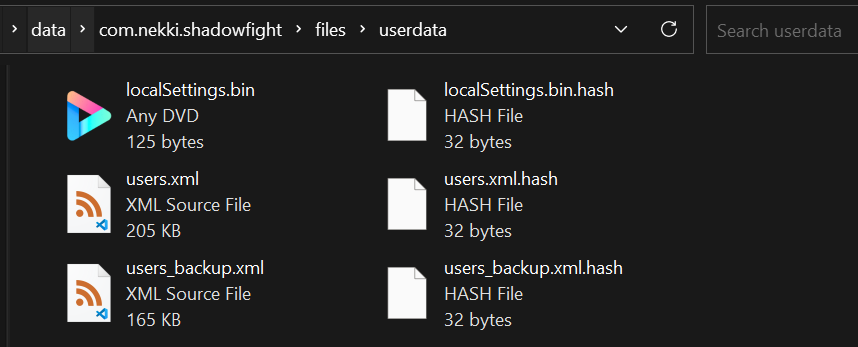
Hash verification can be skipped by simply deleting the corresponding .hash file! (I don’t know why.😝) So if you want to modify the game, delete users.xml.hash, users_backup.xml and users_backup.xml.hash, then you can do whatever you want in users.xml! These three files will be regenerated by the game again, though. Just delete them before you modify the data. And remember to back up users.xml in case you made some mistake. To roll back, simple restore users.xml.
Below are some common modifications. They only change users.xml. Good luck.😉
Tips: I use Visual Studio Code!
1. Increase Money
Open users.xml, and you can see the structure of the xml file.
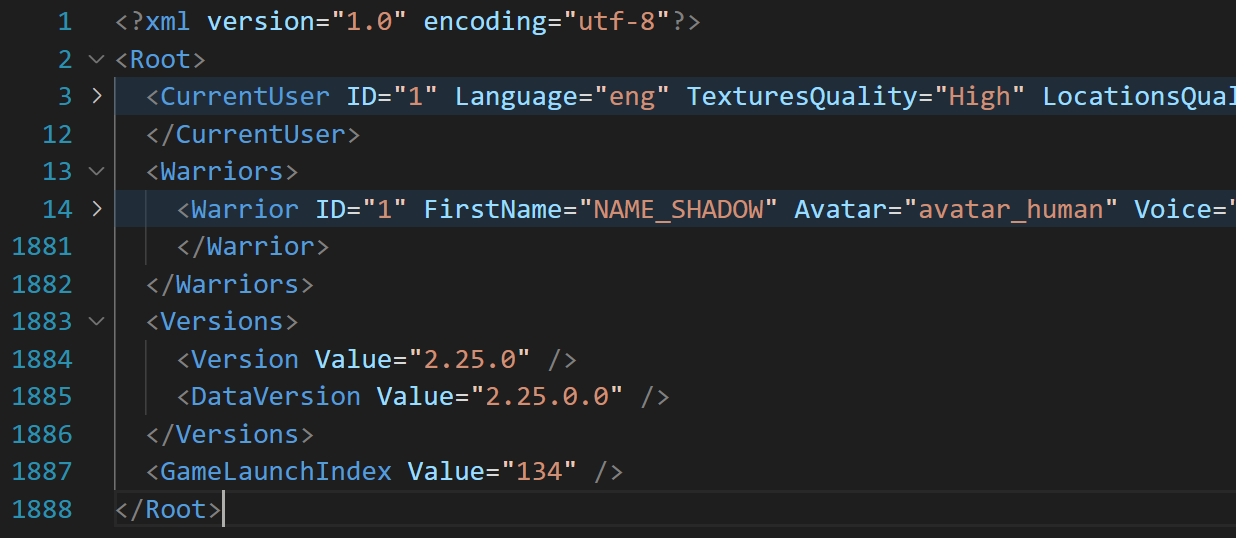
Find Root/Warriors/Warrior , it contains all your progress and data.
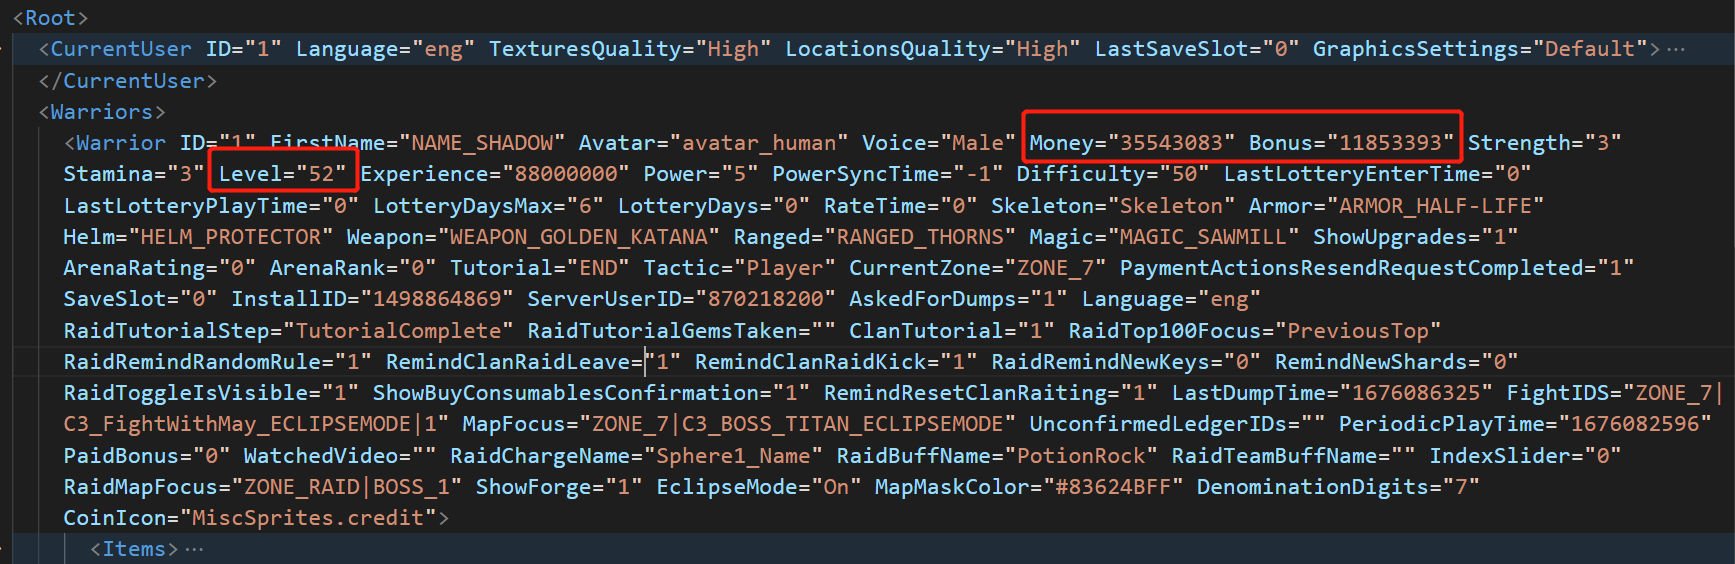
Money and Gems are stored as attribute (Gem is called Bonus in code), you can also modify your level, though.
If you modifies your level and defeat enemies that should be defeated later, game will proceed in an incorrect order, which may cause content missing, or you cannot trigger certain events.
2. Increase Enchantment Material
Some good mod doesn’t provide unlimited enchantment material, and it could be tiring to get enough of them.
Find Root/Warriors/Warrior/Currencies, ForgeMaterial1 - ForgeMaterial3 are corresponding to the green, red and purple ball.

3. Mythical Set
There are some sets that have mythical enchantments. You can just add them to Root/Warriors/Warrior/Items/.
Here are two templates, which will add an equipment of max level (52).
Simple Template
You can easily add an item by adding this line to Items/ by filling the Name attribute. However, you will have to enchant it with mythical enchantment in game after you add the complete set.
1 | <Item Name="" Equipped="0" Count="1" UpgradeLevel="5240" DeliveryTime="0" DeliveryUpgradeLevel="-1" AcquireType="Upgrade" /> |
Complete Template
This template will brings mythical enchantment together. Just fill the two Name attribute.
1 | <Item Name="" Equipped="0" Count="1" UpgradeLevel="5240" DeliveryTime="0" DeliveryUpgradeLevel="-1" AcquireType="Upgrade"> |
Example
Here is a complete example of Monk Set.
1 | <Item Name="WEAPON_C2_Z2_MONK_KATAR" Equipped="0" Count="1" UpgradeLevel="5240" DeliveryTime="0" DeliveryUpgradeLevel="-1" AcquireType="Upgrade" /> |
1 | <Item Name="WEAPON_C2_Z2_MONK_KATAR" Equipped="0" Count="1" UpgradeLevel="5240" DeliveryTime="0" DeliveryUpgradeLevel="-1" AcquireType="Upgrade"> |
Sets Information
Here are some sets, just replace the Name.
1 | Weapon: WEAPON_C2_Z2_MONK_KATAR |
1 | Weapon: WEAPON_C2_Z3_SENTINEL_SPEAR |
1 | Weapon: WEAPON_BP_S5_TIME_SHIFTER |
1 | Weapon: WEAPON_C4_Z1_WARLOCK_STAFF |
1 | Weapon: WEAPON_BP_S1_GUARDIAN |