AOP in Spring Boot
“The dark side of the Force is a pathway to many abilities,
some consider to be unnatural.”
— Darth Sidious
Prologue
If you have programming experience before, of course, you have, you probably heard of Procedure-oriented and Object-oriented programming. OOP couples related functions and data which allows us to focus on abstraction instead of concrete implementation.
However, as business logics grow, objects in the OOP paradigm may become extremely large and verbose, filled with irrelevant code such as parameter validation and logging. To this end, Aspect-oriented programming comes to the rescue. AOP aims to increase modularity by separating concerns into different layers. To be more specific, it enhances existing methods with external advice without actual modification to it.
Well, in case you are a curious reader, I present you with some extra sources to learn AOP a step further.
- Aspect-oriented programming - Wikipedia
- Aspect Oriented Programming and AOP in Spring Framework - GeeksforGeeks
- Learn Aspect Oriented Programming by Example - DEV Community
- Aspect Oriented Programming with Spring :: Spring Framework
Although I named this article AOP in Spring Boot, it is mainly about AOP itself, just using Spring Boot as a demo.
Keep in mind that AOP is not a replacement for OOP. OOP helps the vertical scalability while AOP aims for the horizontal.
Concepts
I think a brief introduction to the main concepts in AOP may help in understanding.
Aspect
First of all, what is aspect? In OOP, we focus on abstraction which ultimately turns logic into objects. Similarly, in AOP, we focus on specific operations across different objects. For example, in a Web application, our controller may look like this.
graph TB;
	OA[Controller A]-->AA1-->LA-->AA2
	OB[Controller B]-->AB1-->LB-->AB2
	AA1[Parameter validation]
	AB1[Parameter validation]
	LA[Business logic A]
	LB[Business logic B]
	AA2[Logging]
	AB2[Logging]
Each controller has its business logic, but to ensure robustness, validation and logging are also required. As a result, our controllers become larger and filled with duplicated code. Thinking in OOP, you may start to add a utility class to perform these extra logics. So it will become like this.
graph TB;
	OA[Controller A]-->A1-->LA-->A2
	OB[Controller B]-->A1-->LB-->A2
	A1[Parameter validation]
	LA[Business logic A]
	LB[Business logic B]
	A2[Logging]
However, this way, our controller is still infested with irrelevant code. The attempt is plausible, and we just need to replace this “utility class” with an aspect. So aspect of AOP is such specific logic that to be injected at different places.
Joinpoint
Joinpoint is the place where our aspect can be injected. For instance, in the previous controller example, before and after the execution of the business logic are two joinpoints we can insert the aspect.
It’s not feasible to insert aspects everywhere. You cannot just insert an aspect before an arithmetic expression or assignment. But, there is one exception — function call, especially for OOP languages that have reflection ability. So by intercepting function calls, we can add extra code before or after its execution without any modifications to the original logic.
Pointcut
Pointcuts are used joinpoints. There will be countless joinpoints as our code is full of function calls, but only a few could be useful. It’s just a term to indicate the joinpoints into which we insert aspects.
Advice
Advice, advice? Why advice? Interesting naming.
Speaking of advice, first, we need to reiterate the aspect. Simply put, the aspect is the abstraction of what we want to do, and advice is its implementation. With joinpoint, there are five types of advice.
- Before: Before the execution of the target method.
- After returning: After a successful return, which means no exception is thrown.
- After throwing: Only after an exception is thrown.
- After: Both successful and exception returns.
- Around: Before and after.
Weaving
Weaving is the process of linking advice to the pointcut. For Java, this can be done in compile, class load, and runtime. To achieve this, a proxy is used to wrap the original method.
Aspect in Action
Well, with the AOP paradigm in mind, let’s write a demo as practice. Here we use Spring Boot as an example. As for the AOP implementation, I use AspectJ, which is currently the most popular.
You can find the complete code of this part at AopDemo.
Project Initialization
First, create a simple Spring Boot application.
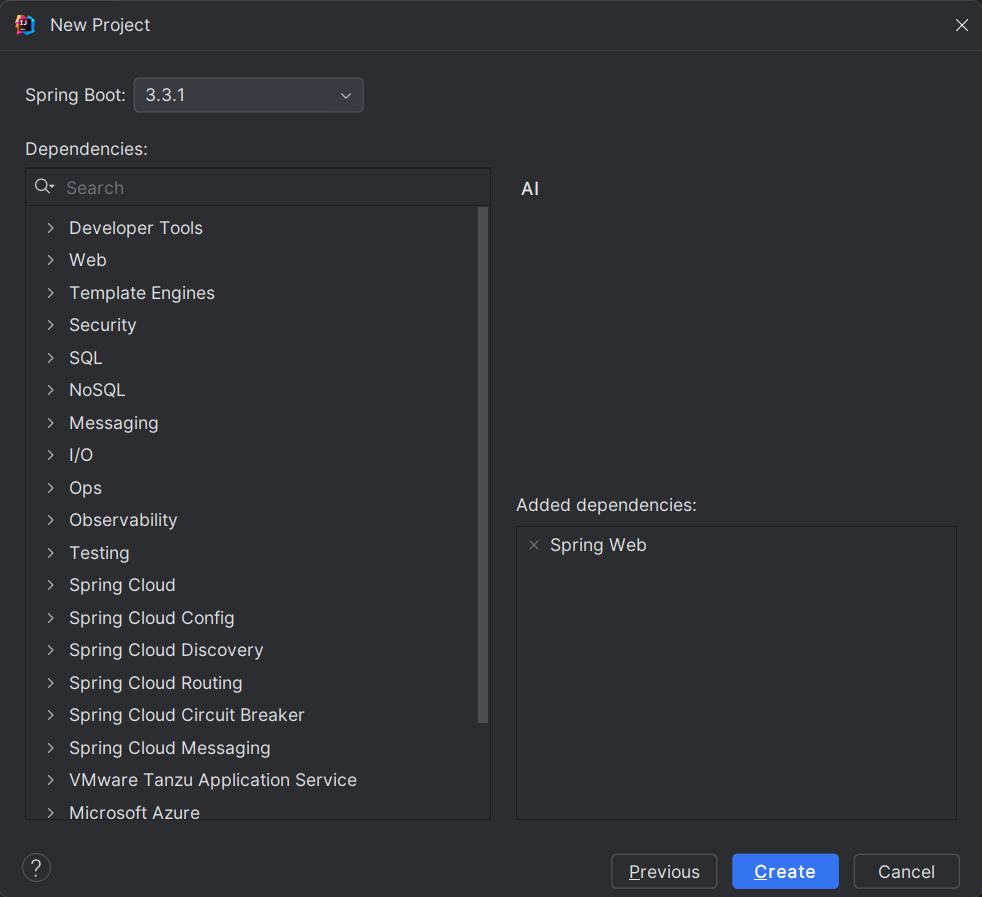
After creation, add AspectJ dependency. You can find the latest version at Maven Center.
1 | <!-- https://mvnrepository.com/artifact/org.aspectj/aspectjweaver --> |
Then, enable AspectJ proxy in the Spring Boot application by adding @EnableAspectJAutoProxy annotation to the main class.
1 |
|
Add Demo Endpoints
Here we add some example endpoints as our joinpoints.
1 |
|
Here we use an annotation to decorate one of the methods. It is used to demonstrate another approach to define a pointcut. The annotation is defined below.
1 |
|
Your First Aspect
Aspect definition
The definition of an Aspect should be annotated with @Aspect, and should also be annotated with @Component to let Spring Boot discover it. Here we add a logger, which we’ll use later.
1 |
|
Pointcut definition
You can define the pointcut using @Pointcut. If the same pointcut is used by many advices, this way can reduce duplicated definitions at each advice. This pointcut includes all the methods in our controller.
1 |
|
Before advice
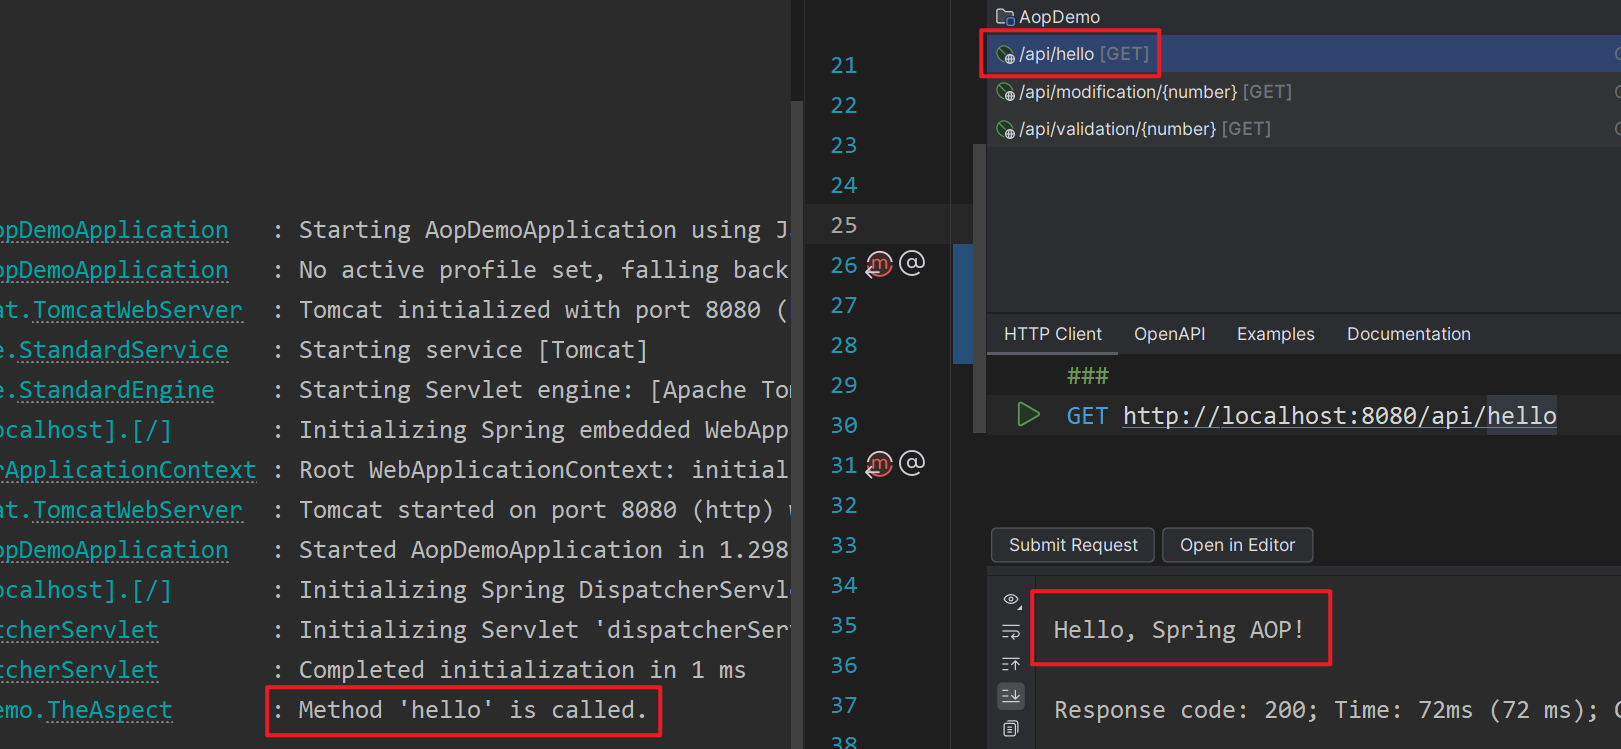
Logging only
Now that we have the pointcut, we can add advice to it. Here, we insert a log before each call.
1 |
|
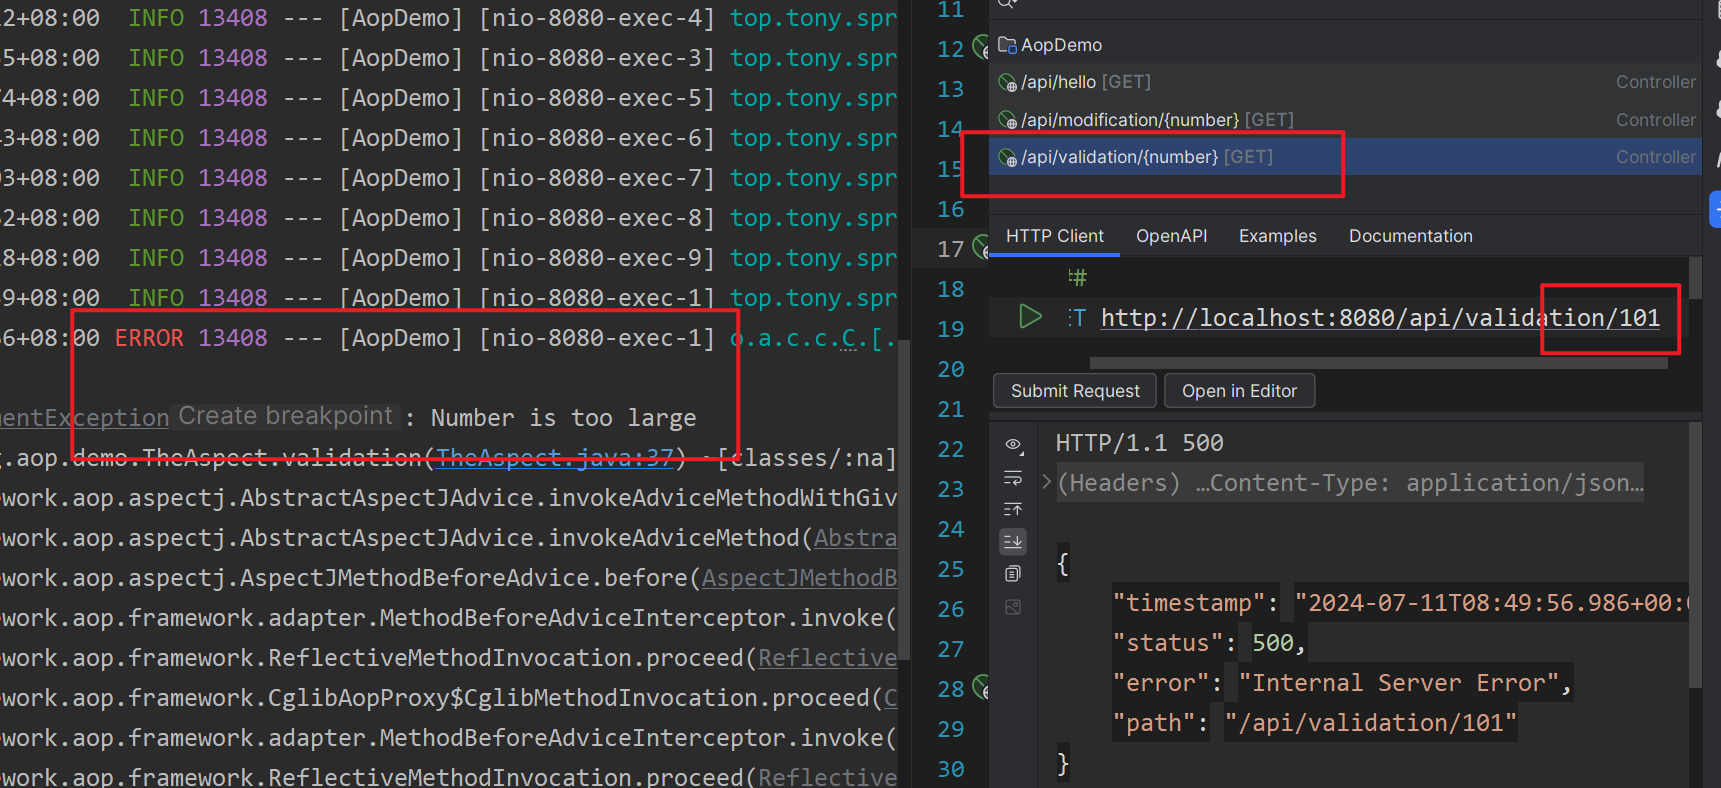
Parameter validation
Above we did nothing in the advice. However, the true potential of the advice is that it can interfere with the execution of the target method.
1 |
|
In this advice, we get the target method and check the parameter with the name number to see if it is larger than 100. This way, we can separate the parameter validation from the business logic.
After advice
After returning
By adding @AfterReturning annotation, we are able to access the return value of a method. This only works when the method successfully returns without exception.
1 |
|
If you want to include the returning value, you have to explicitly set returning value in the annotation, which injects the return value with a specific name.

After throwing
Similar to @AfterReturning, @AfterThrowing only works when the method throws an exception.
1 |
|
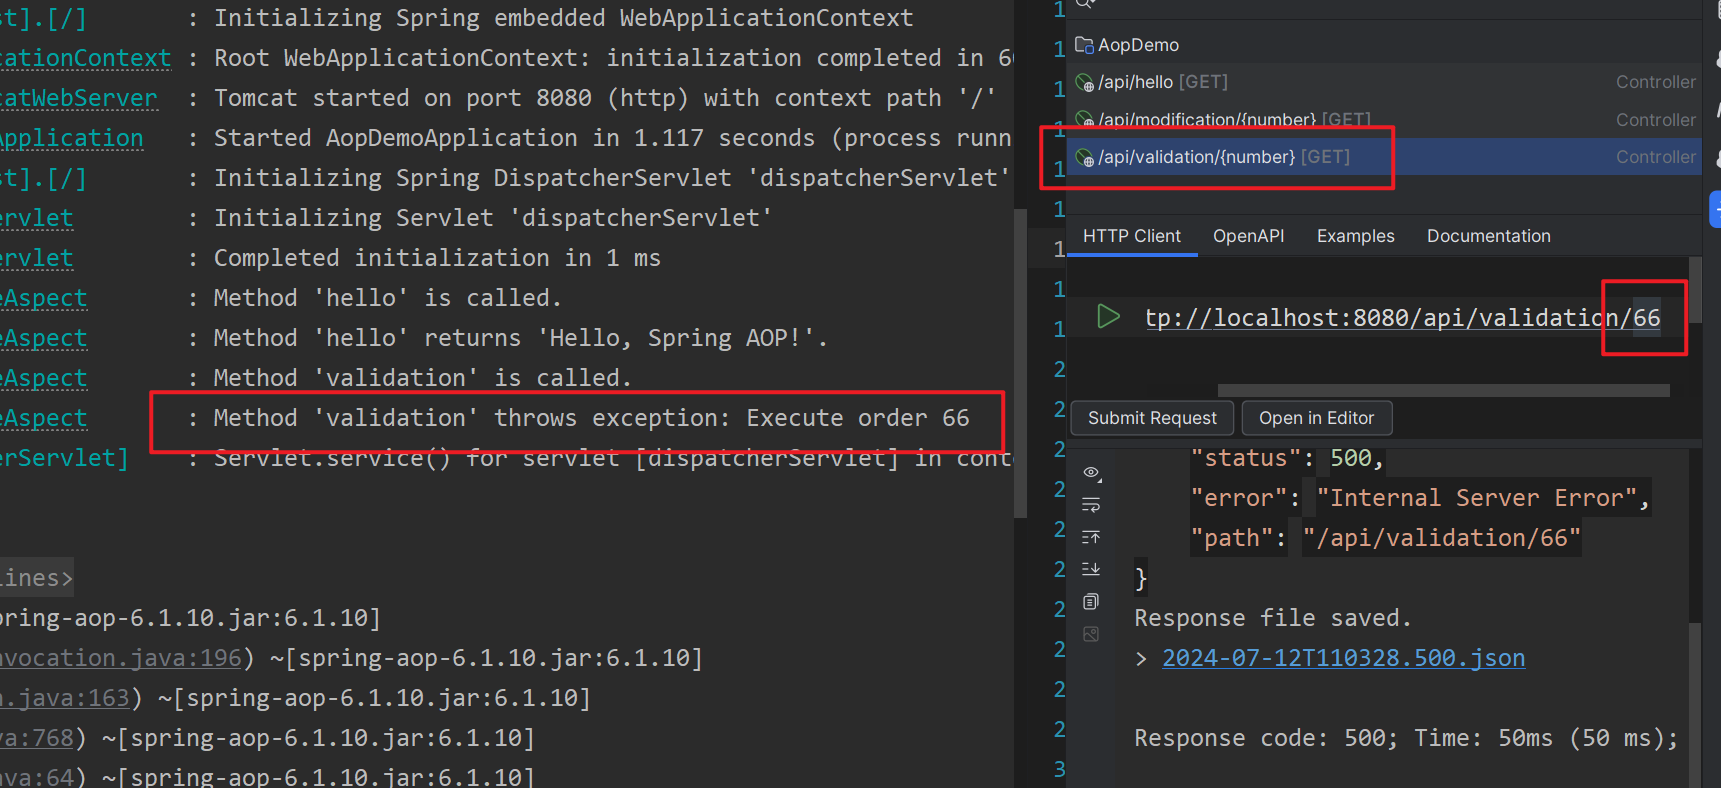
When we send 66 to the endpoint, it will pass our parameter validation but still raise an exception. This case, it can be intercepted by @AfterThrowing.
Around Advice
Finally, it’s the most powerful @Around advice, which will fully take control of the target execution. It is capable of adding logic before and after a pointcut, and what’s more, modifying the incoming arguments or outgoing returns.
Here, we use our annotation as the pointcut definition and force the parameter with the name “number” to be 66. Notice that ProceedingJoinPoint is required as we now can decide whether to execute the method or not. If there is return value, you should also return it.
1 |
|
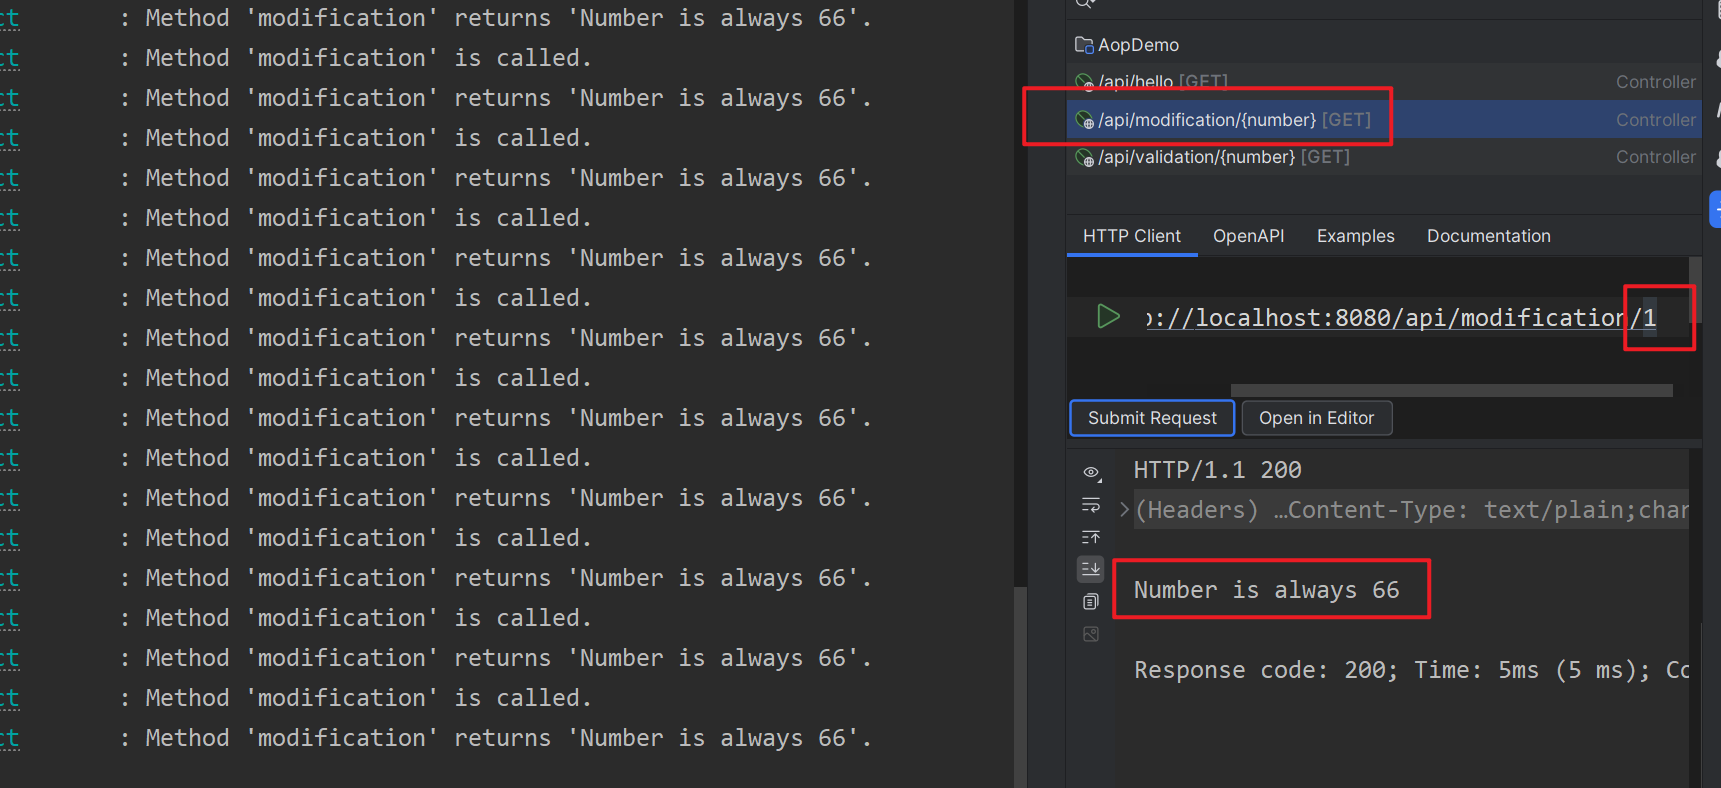
So, when we call the endpoint, it will always be 66.
By the way, if we can modify a parameter, it means we can also set a parameter using @Around! This is useful when you want to add user authentication information or some properties in the request (like cookies value) into your controller methods without explicit getters.
Epilogue
Tada!🎉How do you feel? Excited? Hope you enjoy it, and most importantly, use it in your next project. ᓚᘏᗢ