Setting Up RabbitMQ
“You may delay, but time will not.”
— Benjamin Franklin
Prologue
Sometimes you may want to send a message to someone, but don’t want to do it yourself. How to achieve this? Find someone else to send it! Then, if there are too many messages and you don’t want to receive them at once? Stash them somewhere else, and take them at your own pace!
So this is the basic idea of AMQP (Advanced Message Queue Protocol), a message-oriented middleware. It allows you to publish messages to a queue and consume them in various methods. One of the most famous implementations is RabbitMQ. In this article, I will talk about the installation of it and the basic use of its client.
I’ll only talk about the Linux installation, specifically Ubuntu 20.04.
You can refer to the official Tutorial for basic concepts.
1. Installation
It is highly recommended to use Docker to deploy RabbitMQ on your server. Manual installation is error prone.
1.1 Install with Docker
If you do not yet have docker, you can see this post: Getting Started With Docker.
First, pull the official RabbitMQ image with management plugin.
1 | sudo docker pull rabbitmq:3-management |
Then, run it.
1 | sudo docker run -d --name rabbitmq -p 5672:5672 -p 15672:15672 rabbitmq:3-management |
Boom!💥You’re all set! If you want to change RabbitMQ configuration, you can mount it directly, or change it inside the container later.
1 | docker run -d --name rabbitmq -p 5672:5672 -p 15672:15672 -v sudo /path/to/your/rabbitmq.conf:/etc/rabbitmq/rabbitmq.conf rabbitmq:3-management |
1.2 Manual Installation
1.2.1 Erlang
As we know, RabbitMQ is written in Erlang, so we need to install it first as the dependency. But be warned, not all Erlang versions are supported, so choose carefully. Check Erlang Version Requirements for more information. In my case, the latest version of RabbitMQ is 3.13.3, having support for Erlang 26. You can visit Erlang official page for source code download.
For example, we use Erlang 26.2.5, and extract the tar.gz with tar -xvf. You may need ncurses-dev installed.
1 | sudo apt install ncurses-dev |
Then, just create installation directory and build Erlang.
1 | mkdir /opt/erlang |
Finally, add Erlang to the system PATH.
1 | export ERLANG_HOME=/opt/erlang |
You should have Erlang installed now. You can use erl to start Erlang console.
1.2.2 RabbitMQ
First, let’s get the latest RabbitMQ release from GitHub, for me it’s 3.13.3. Then use tar -xvf to extract it and copy it to /opt/rabbitmq_server-3.13.3. Then in .bashrc, add it to the PATH.
1 | export RABBITMQ_HOME=/opt/rabbitmq_server-3.13.3 |
Finally, you can enable RabbitMQ management plugin.
1 | rabbitmq-plugins enable rabbitmq_management |
2. Basic Use of RabbitMQ
If you run RabbitMQ with Docker, you should first enter the container with the following command.
1 | docker exec -it rabbitmq bash |
If you have Docker extension for Visual Studio Code, you can simply do this by attaching shell to a running container.
2.1 Commands
Below are some common commands to start or stop RabbitMQ server.
1 | rabbitmq-server # run in the foreground |
2.2 User management
You should have RabbitMQ server started to proceed any operations.
To access RabbitMQ management dashboard remotely, a new user must be created. Here we create a user and set it as Administrator.
1 | rabbitmqctl add_user <username> <password> |
We can check permissions of a user by this.
1 | rabbitmqctl list_users |
You can change a user’s password like this.
1 | rabbitmqctl change_password <usrname> <new password> |
2.3 RabbitMQ dashboard
After adding an administrator, open port 15672 of your server and check the RabbitMQ dashboard! If you have it installed on your local machine, just visit it on localhost, which doesn’t require administrator privileges.
Once you have access to the dashboard, there’s no need for the CLI.
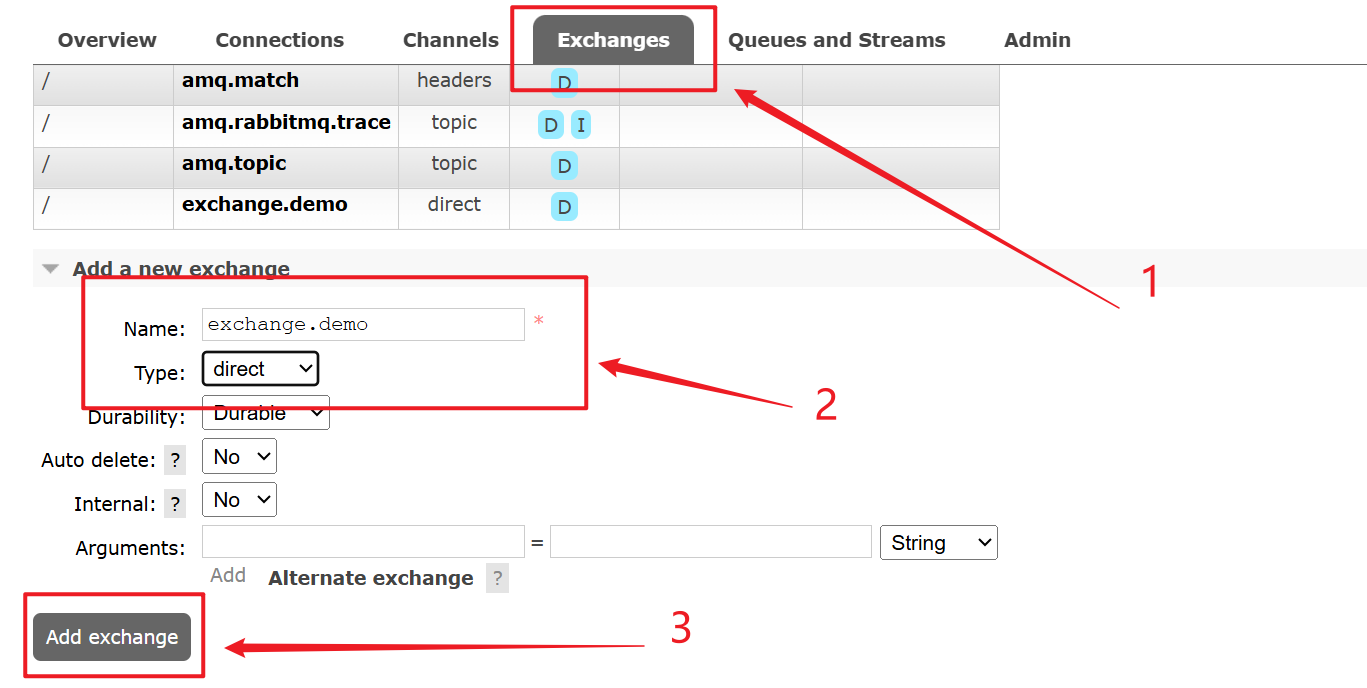
Adding exchanges and queues
Go to “Exchange” tab, and expand the section “Add a new exchange”. After submit, a new exchange will appear in the table above.
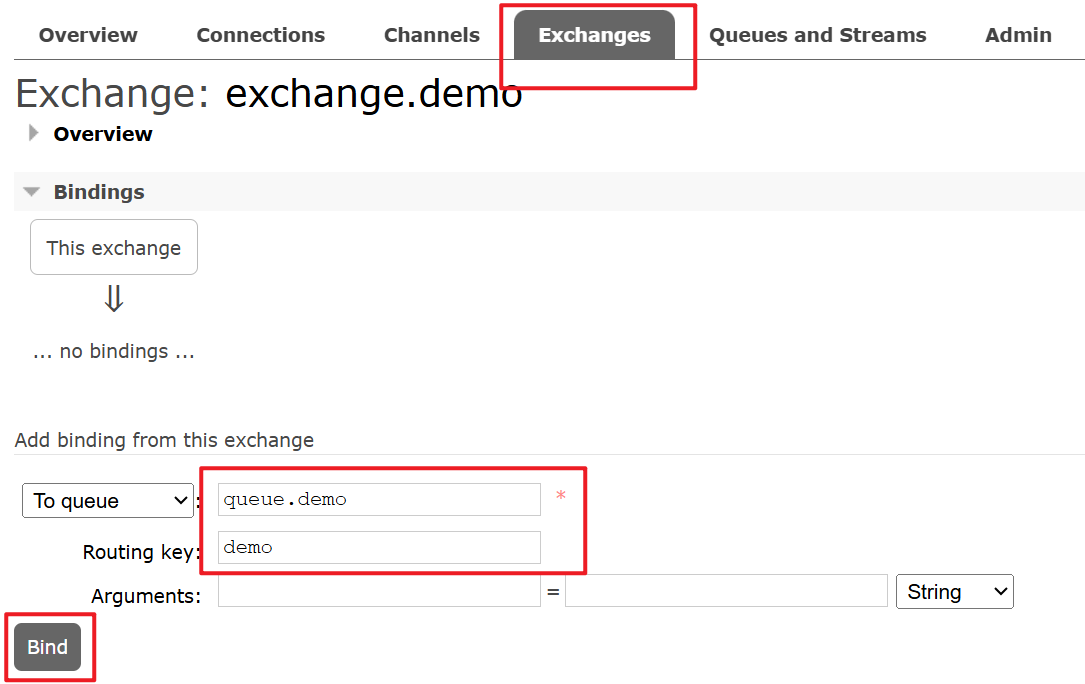
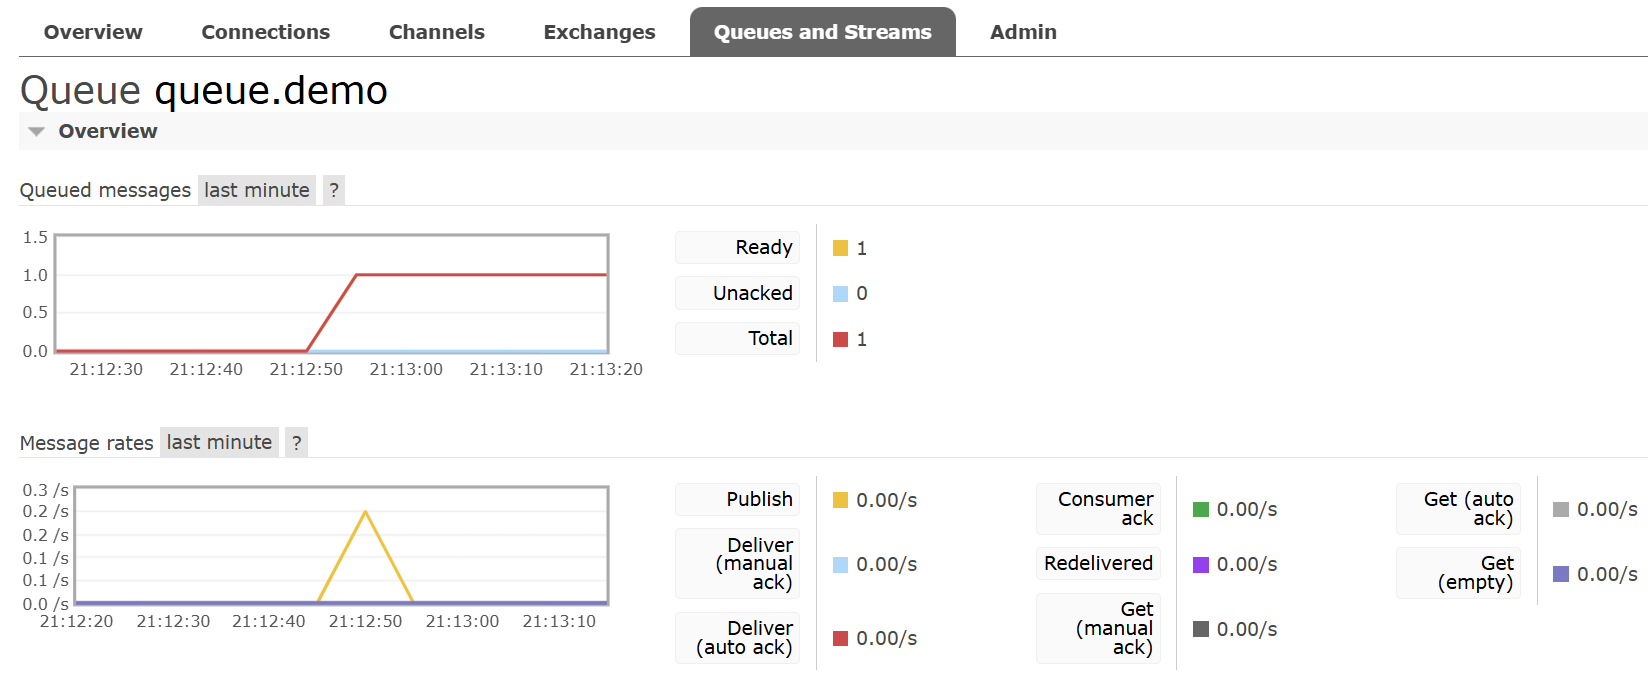
Then, go to “Queues and Streams” tab for the same thing.

When you have both exchange and queue, you can bind then bind them. Click the exchange to go to the detailed page, and add a binding.
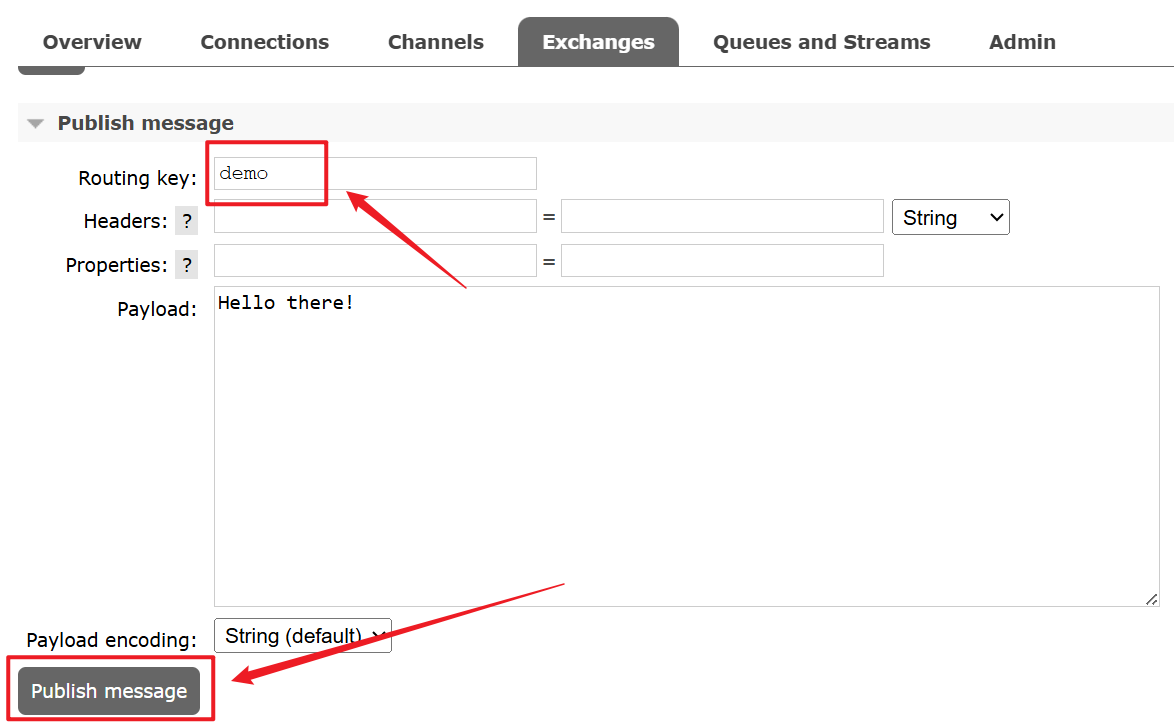
Sending your first message
Below you can see the “Publish message” section where you can test message production.
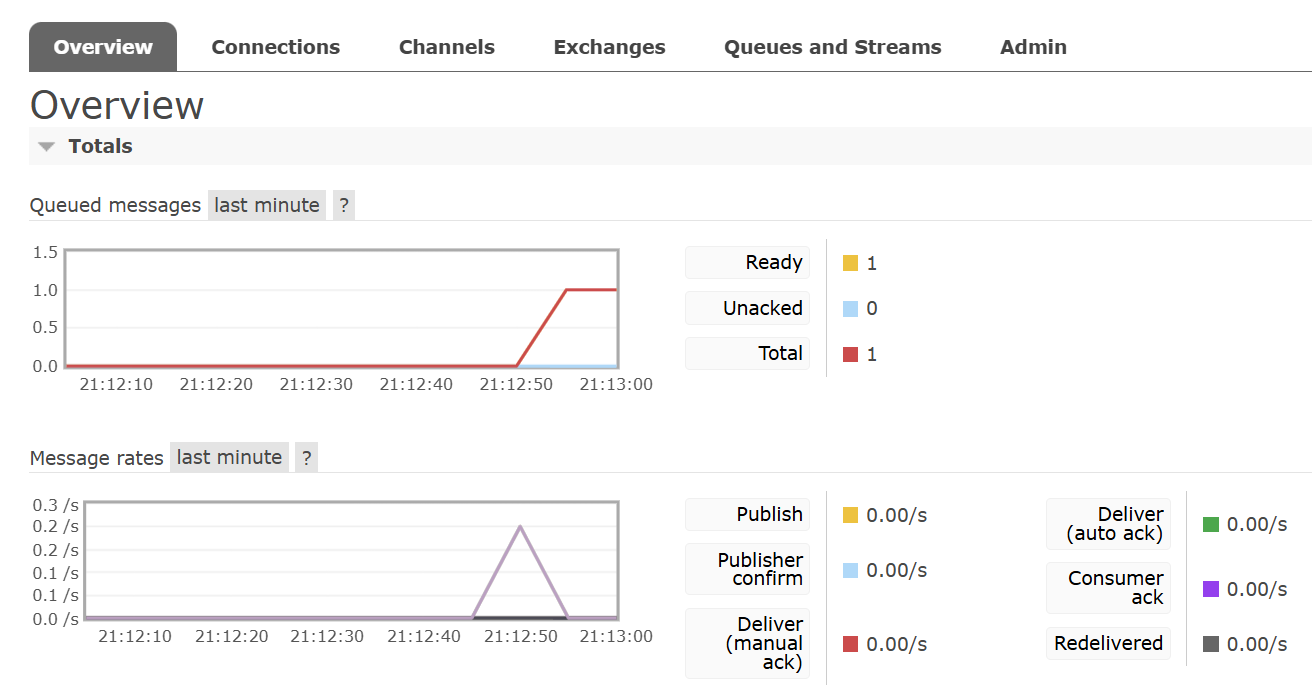
You can see the message statistics in the overview tab or the details tab of specific queues.
Epilogue
Tada!🎊You have RabbitMQ up and running! In the following article, I’ll demonstrate how to integrate RabbitMQ into Spring Boot application. Coming soon.🙂
By the way, there’s some other stuff I want to talk about. First is the installation. I tried to use package management to install RabbitMQ, but it turned out to be a mess. The official setup script is long and will add many configurations to your system. And the installed server won’t start up due to unknown reasons.😖The best solution is indeed using a docker, but it’s not available on my machine, so I didn’t show that.
There are other AMQP implementations like Apache Kafka and RocketMQ, but RabbitMQ seems to be more popular? Anyway, you have RabbitMQ, enjoy. ᓚᘏᗢ