Lightsaber Effect in Photoshop
“You don't know the power of the Dark Side.”
— Darth Vader
Prologue
As a Star Wars fan, it will come inevitably that you want to have a real lightsaber or a photo of yourself wielding one. A true lightsaber is expensive, while making a picture is free. In this tutorial, I’ll show you how to create a lightsaber effect in Photoshop.
Making a Lightsaber
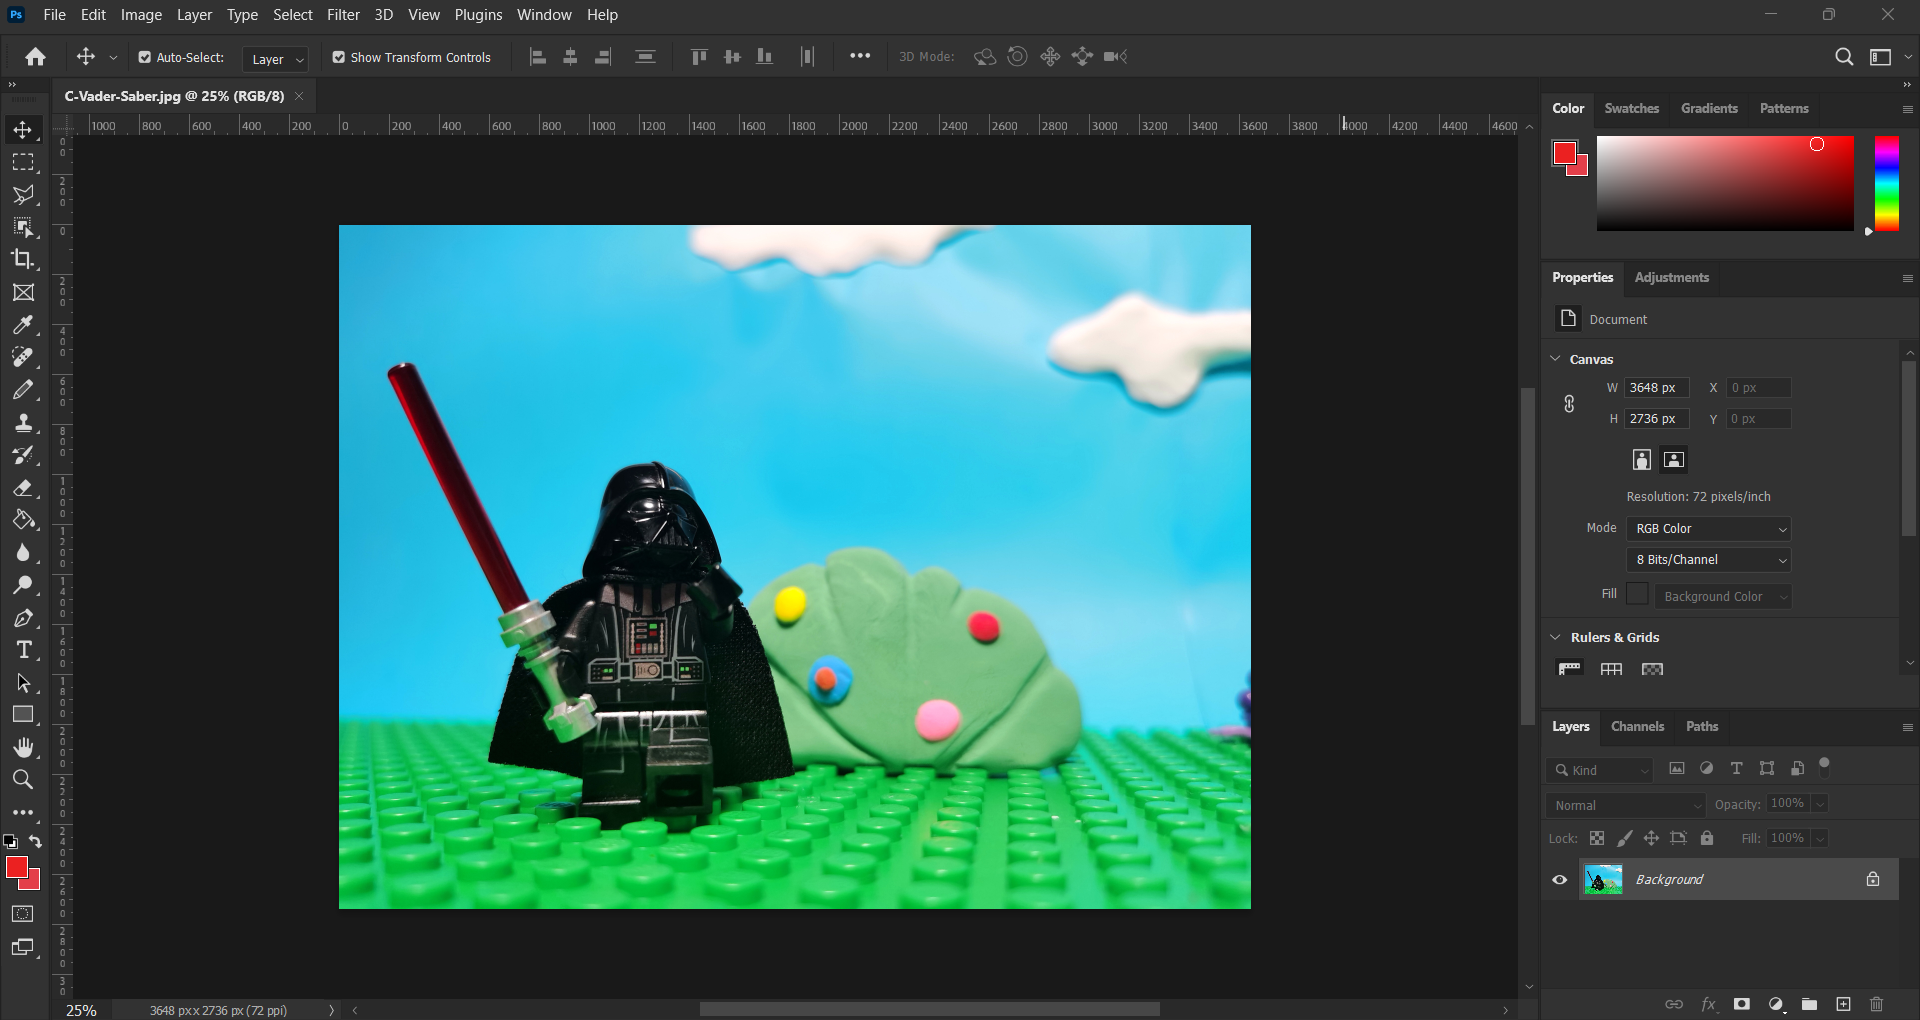
1. Prepare an Image
Of course, the first step is to prepare an image of you or anything that you want to add a lightsaber to. Here we use a LEGO minifigure of Darth Vader.
2. Mark the Lightsaber
In the image, use any selection tool to mark the lightsaber. Usually a Polygonal Lasso Tool is used. Make sure the selection is as accurate as possible. Apply a 5-pixel (or any suitable value) feather to the selection, and create a solid color layer with the selection.
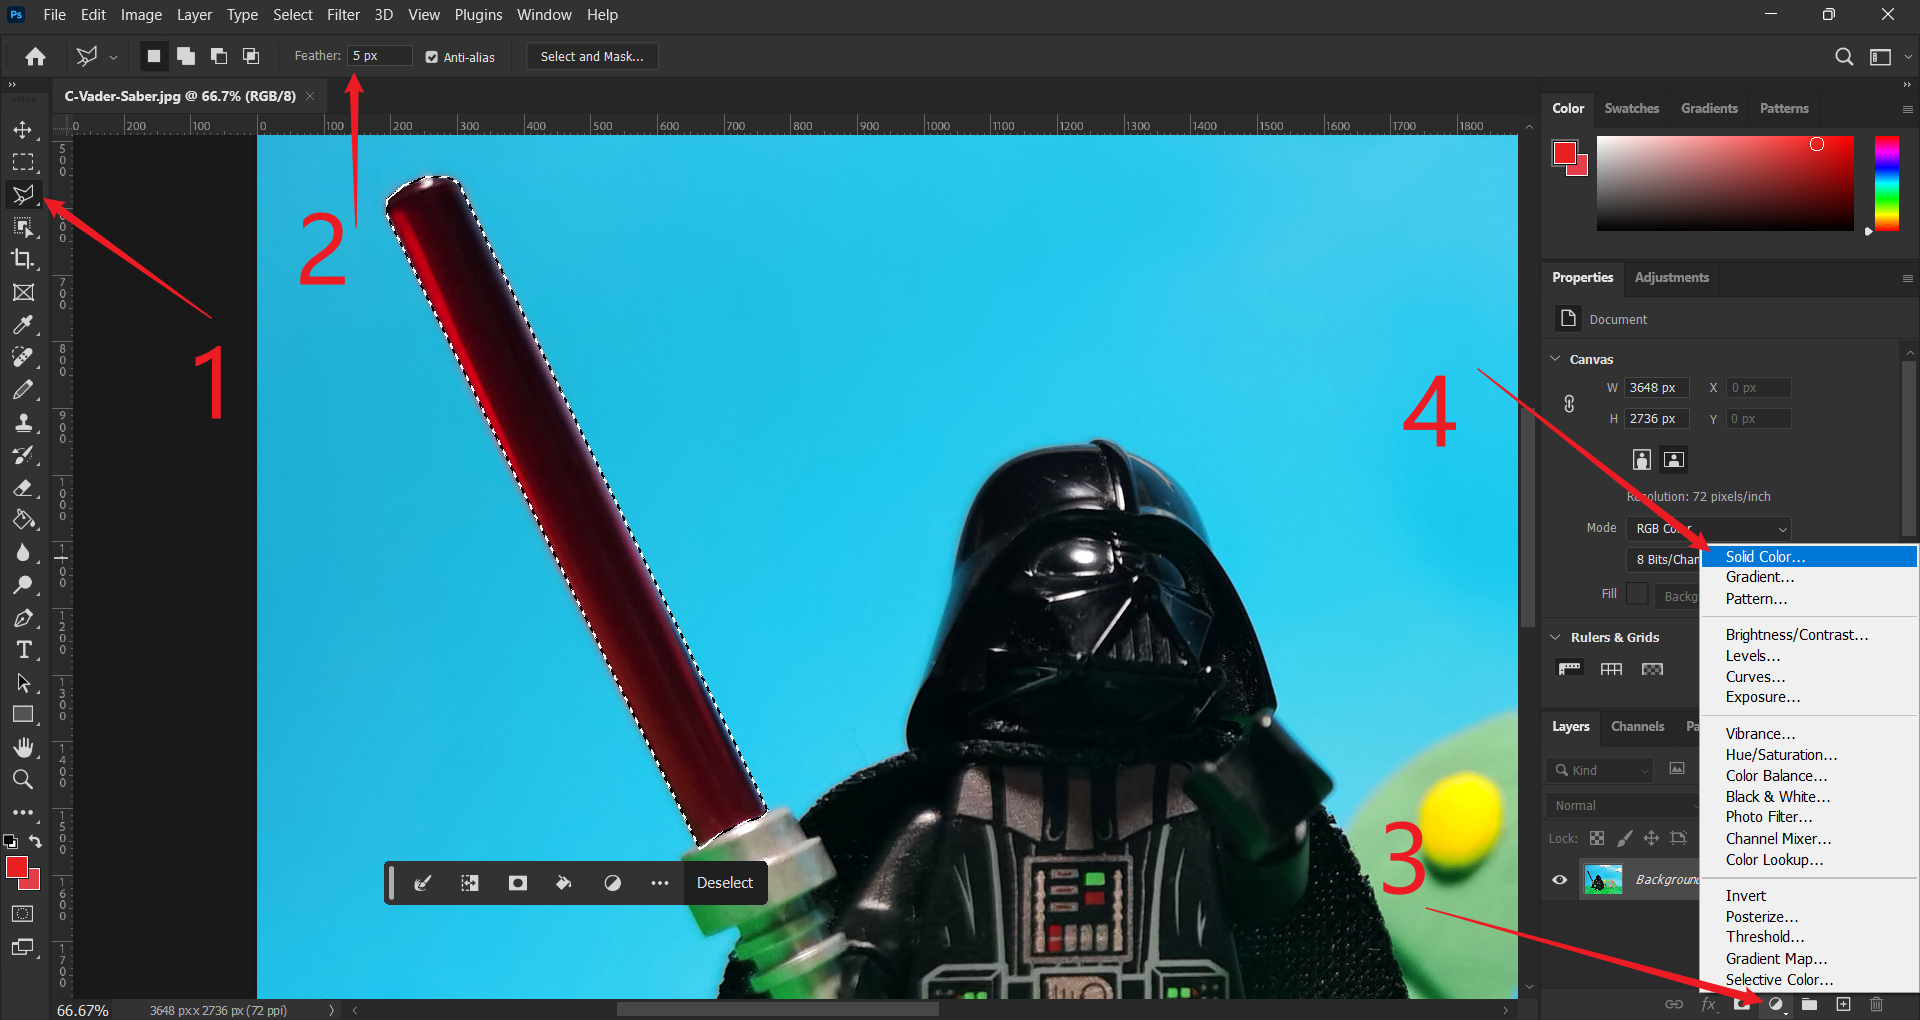
The color of the solid color layer is the center color of the lightsaber, so typically, it is white.
3. Ignite it!
Double-click on the layer, to open the Layer Style dialog. Apply Outer Glow with your favorite color. Adjust the parameters as you wish.
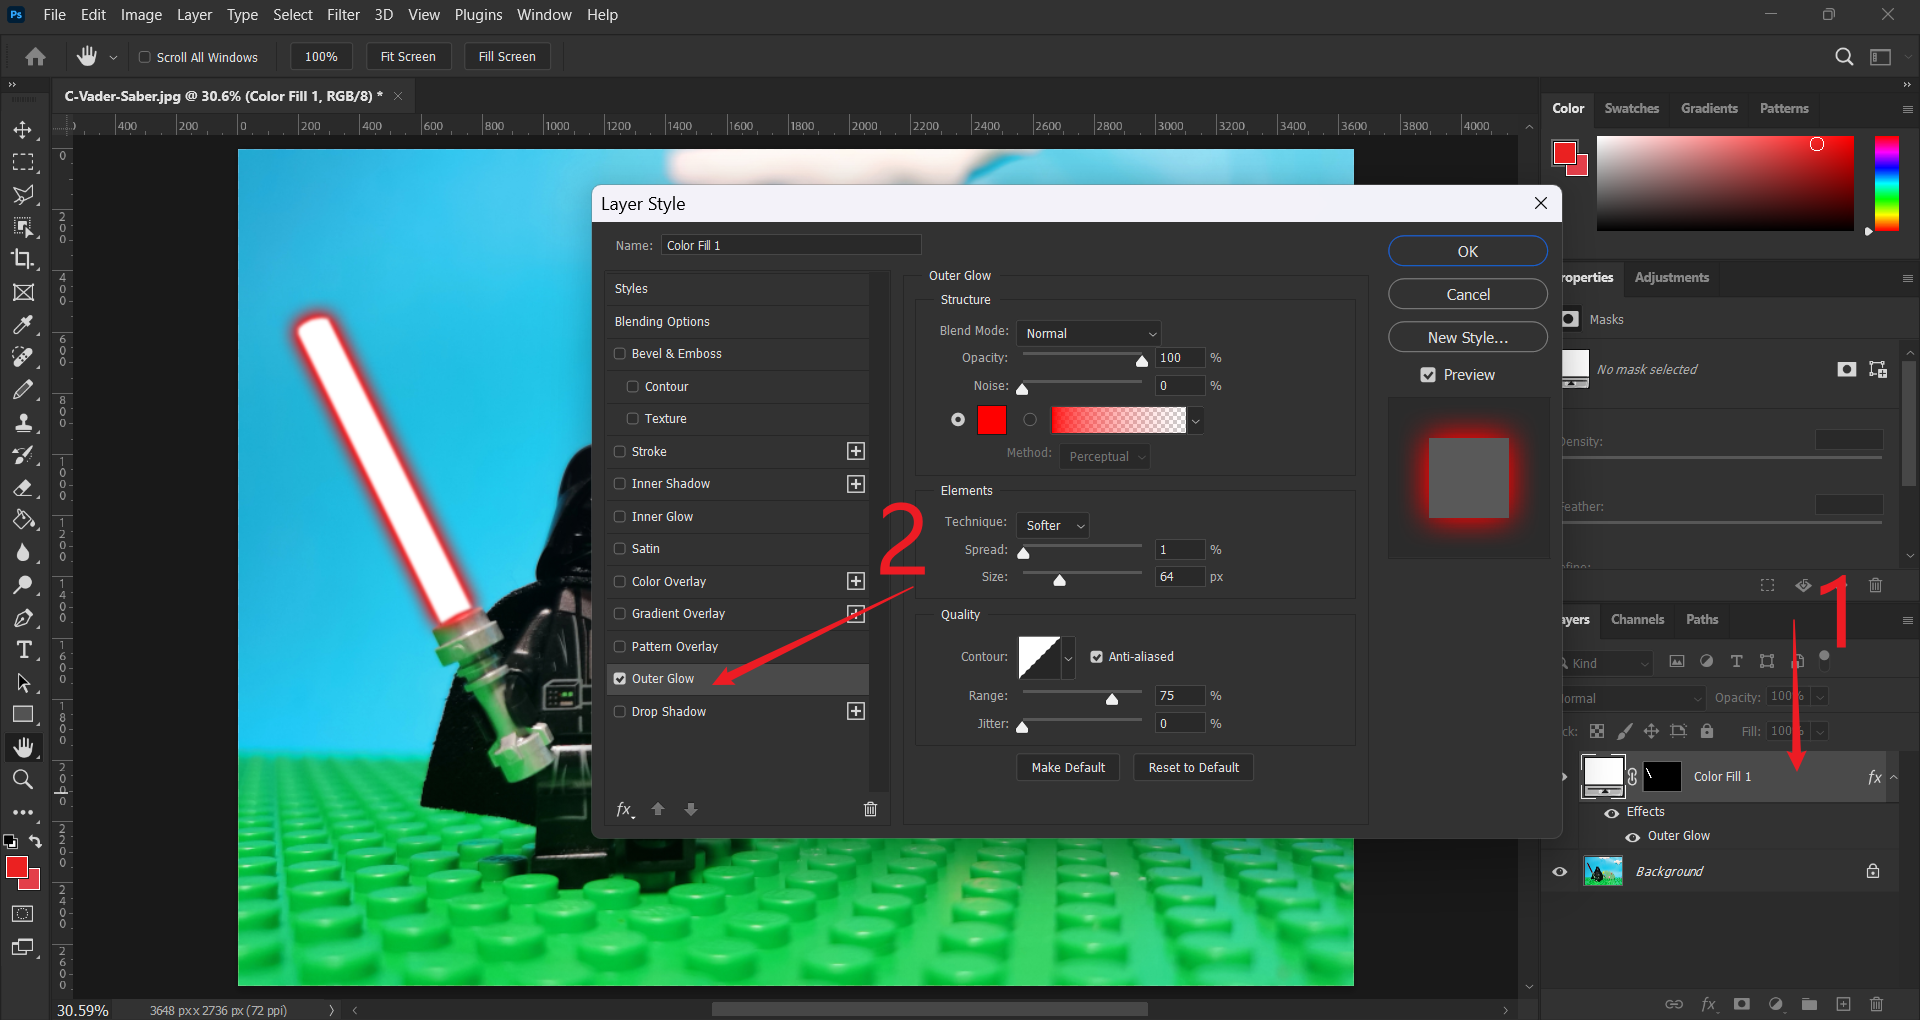
A tip for you. If you want a smoother edge, you can apply a Gaussian Blur filter to the solid color layer.
And Tada! You have your lightsaber!🎉
Epilogue
Well, isn’t it easy? Now use it in your next photo! ᓚᘏᗢ