Deployment Practice With Kubernetes
“It takes a minute to have a crush on someone,
an hour to like someone,
and a day to love someone...
but it takes a lifetime to forget someone.”
— Kahlil Gibran
Prologue
Suppose that you, my friend, are developing a software, how would you publish it? If it’s a client application, you may manually build it, upload the artifact, and that’s it. If it is a backend server… Think about it, you have to stop the current service and re-deploy it (or them?). Such tedious work.🥴
For long people are trying to automate the development process. The deployment, usually involving only some script execution, can be automated relatively easier. By automatically build and deploy our product, we are practicing the idea of Continuous Integration/Continuous Delivery, a.k.a. CI/CD. Generally speaking, it is the process of automatically build, test and eventually publish our product.
Recently, I got some work on a Web application, and with what I learned in school, I decided to use CI/CD to automatically deploy it on my server. It ROCKS!😍Therefore, I’m writing this article to record this excellent practice.
In this post, you’ll learn:
- “Dockerize” a Spring Boot application.
- Manage deployment with Kubernetes. (k3s to be specific.)
- Deployment script practice.
- Integration with GitHub CI/CD.
- Some tips and troubleshoots.
So, good luck, have fun!🫡
All code for this post can be found at GitHub.
Dockerizing Spring Boot Application
In this part, I’ll talk about the very basic of deploying your application with Docker. And it will be the foundation for more advanced deployment with Kubernetes.
Install Docker
Well, although Docker is important in this post, it is not the point to go further into its installation. But it can be a problem now since, … some access restriction to the official Docker website. So you may use mirror when installing it.
1 | # without mirror |
For more information on Docker, you can refer to Getting Started with Docker.
There maybe some network issues when pulling images, you can refer to Network Issues for more information.
Build with Dockerfile
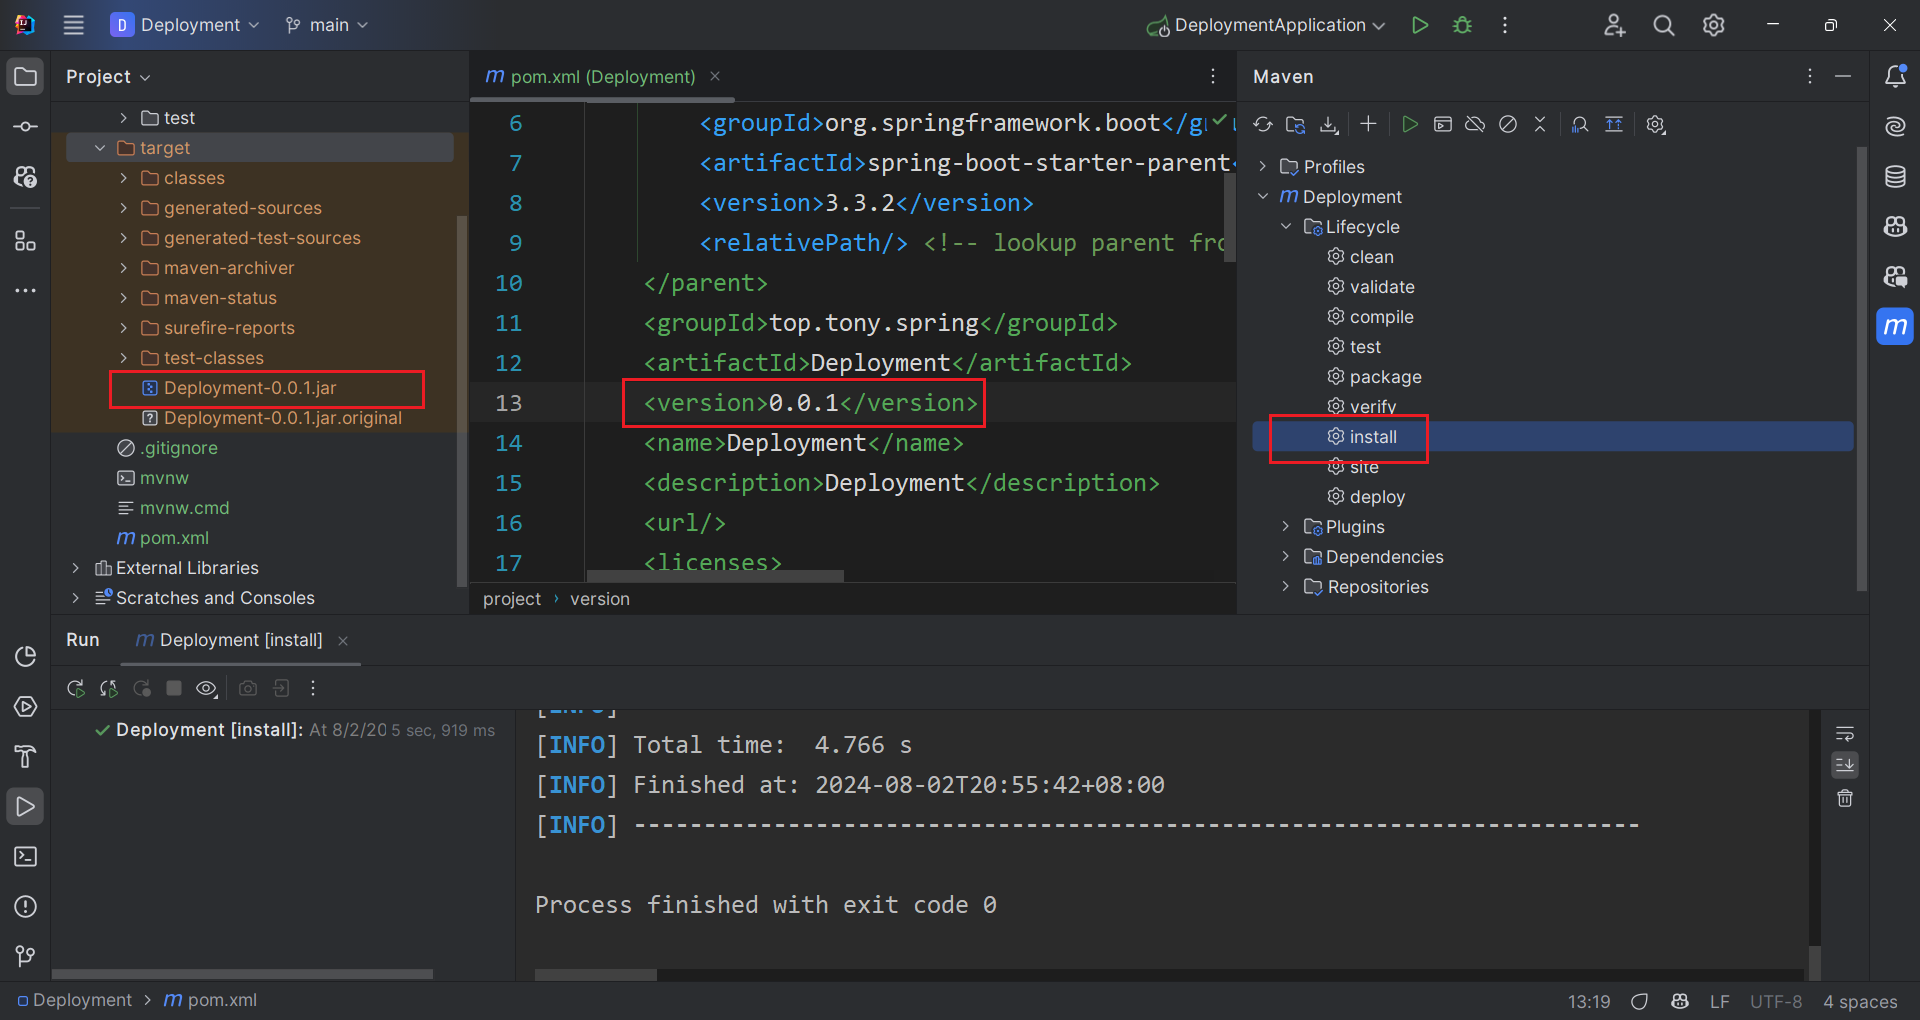
Assume that you already have a Spring Boot application ready for deployment, the first thing is to use maven install to pack it into a .jar executable file as shown below. In case ignored, you can change the version in the pom.xml.
Then, we need a Dockerfile to create an image from our .jar. The image runs our application only, so the Dockerfile is quite simple, copy our .jar into it, and run it on start. And don’t forget to expose our port.
1 | FROM openjdk:17-jdk-slim |
It is always a good practice to use a smaller base image, so here we use JDK slim from OpenJDK. Actually a JRE base image is better, but I didn’t find a suitable one.
And of course, you can add more arguments based on your use case.
1 | CMD ["java", "-Duser.timezone=Asia/Shanghai", "-jar", "/app.jar", "--spring.profiles.active=dev"] |
Then, we can build the Docker image with the following command.
1 | sudo docker build -t deployment:0.0.1 . |
Finally, you can test run it with docker run (not in background), and test it with curl in a new terminal session.
1 | sudo docker run -p 8088:8088 deployment:0.0.1 |
More Flexible Dockerfile
Although we have the application running with Docker, but we have to modify the Dockerfile for every version update. To tackle this problem, we can use ARG option in the Dockerfile. This ARG is required when building the image, you can also add a default value by using ARG VERSION=0.0.1.
1 | FROM openjdk:17-jdk-slim |
So now, we can build the image with the following command. The rest is the same as before.
1 | docker build -t deployment:0.0.1 --build-arg VERSION=0.0.1 . |
I think it is enough for our deployment purpose here. :)
Manage Deployment with Kubernetes
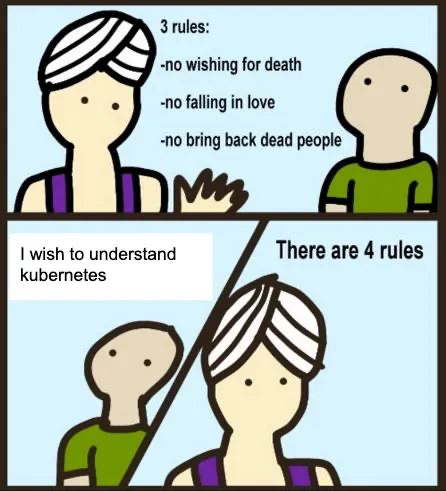
Now, its time to introduce our big ⭐ today — Kubernetes! It is most famous for the ability to automatically deploy containerized application with high scalability. It is powerful yet extremely complex, so many consider it impossible to master Kubernetes. (I love this meme. 🤣)
Kubernetes is, however, too powerful for small applications, so we usually use a lightweight distribution — K3s. In the following sections, we’ll use k3s as demonstration. The ideas are the same, so I’ll just use Kubernetes when talking about concepts.
Install K3s
By default, K3s uses containered as the default container service. However, as the container layer is decoupled, we can also use Docker. To install K3s on your server, run the following command.
1 | # official script |
Well, this is it. Next, we’re going to explore the basic concepts in Kubernetes.
Concepts
In Kubernetes, the main resources and their relations are shown in the following figure, and they can all be represented by a YAML file.
graph LR;
	A[Service]--expose-->B
	B[Deployment]--manage-->C
	C[Pod]--manage-->D
	D[Container]
	E[ConfigMap]--config-->B
Pod provides a direct control over containers. It works like, a wrapper in Kubernetes. A pod may contain multiple containers to ensure additional features. You can get all running pods with the following command. And as container is not actually part of Kubernetes, you can get them with Docker commands.
1 | sudo kubectl get pods |
Deployment, as its name indicates, is important in deployment. It is the key for scalability as it can seamlessly scale pods up or down. I’ll show you how to create a deployment in the next section.
Finally, the Service expose the deployment, so that it can be accessed by the outside world. It ensures the deployment is consistent. For small scale deployment, however, I don’t think Service is that important, as Nginx could do the job. So I’m not going to talk about it now.
Create a Deployment
Let’s get serious. Now, you have the Docker image, how to make the best of K3s to automatically deploy it? Well, talk is cheap, I just show the YAML file.
1 | apiVersion: apps/v1 |
Some thing to explain. K3s manages containers in its own way, so we have to convert Docker configurations into K3s equivalent. The most common use is -e and -v to set environment variables and mounted volumes respectively.
To set environment variables for containers, you need to use config map. Here we import environments from deployment-config, so let’s see its definition. All environments are defined in data section.
1 | apiVersion: v1 |
The reason we use such an environment is to allow different active profile for our Spring Boot application.
To mount volumes, you just define it in the deployment.yaml.
One more thing, pay attention to hostNetwork. If your application need to access database or whatever needs network connection, you should set it true.
Finally, you can deploy your application by applying these two YAML files. To delete the deployment, just replace apply with delete.
1 | sudo kubectl apply -f env.yaml |
And you can again test it with curl localhost:8088/api/ping.
If you updated your YAML files, there is no need to delete them before applying. K3s will automatically update it for you. However, if you updated your image (without changing the label), you have to delete the deployment first. Because K3s only update when the YAML file changes.
Deployment Script Breakdown
Now that you are familiar with every part of the deployment, let’s make a script to do it automatically.
Script Overview
In the script, we are going to cover these steps.
- Automatically discover latest version and artifact.
- Build Docker image.
- Apply new deployment.
The first step is a little tricky, as it automatically choose the latest version of your application.
At the same time, we want to log our deployment into a file.
Version Discovery
We use regular expression to find version in our published artifact, and choose the latest version to deploy.
1 | # iterate all files under `target' to find the latest version |
tee is a useful command when you want the output to be displayed on the terminal and wrote into a file.
Build Docker Image
In this step, we use the $max_version as the argument to build our docker image.
1 | if [ ! -f Dockerfile ]; then |
Update Deployment
Since we may change the version of our Docker image, so we’d better not hard code it in the YAML file. However, K3s doesn’t support argument when apply a new deployment, so we have to resolve it manually.
To address this problem, we rename our YAML file to deployment.template.yaml, and replace the image version with a safe placeholder {VERSION}. Then every time we create new deployment, we generate a new YAML file with the correct version. And since our Docker image changes on deployment, we should delete the previous deployment so that K3s can apply the latest deployment.
1 | # constructing new deployment.yaml by replacing {VERSION} with $max_version |
At last, we can apply the new deployment.yaml.
1 | echo "[INFO] Applying deployment.yaml" | tee -a deploy.log |
What? You want a complete deployment script? Well, here it is.😉
1 |
|
Now, you are able to deploy your application with a single command!🎊
GitHub CI/CD
Although you can deploy with a script, you still have to manually build the artifact, upload it to the server and execute the script. How can the whole bunch of these errands be completely automated? The answer is — CI/CD pipeline. In this section, I’ll show you how to use GitHub CI/CD to enable automatic deployment.
GitHub Workflow
The first thing is to add a GitHub workflow file to your repository to enable GitHub Action. This example shows the minimum steps to build and publish a Spring Boot application. It says build and publish our product on every push to the release branch.
1 | name: Build and Deploy |
In the step “Build with Maven”, we add -DskipTests because it makes no sense to test a program on deployment. And tests may fail if it involves database connection or environment sensitive operations. So just skip them, test before publishing.
When build is complete, we upload the artifact to the server, and run the deploy.sh we wrote in the last chapter. Here, it involves four GitHub action secrets. HOST, USERNAME, and SSH_PRIVATE_KEY are used to establish connection with the server while DEPLOY_PATH indicates where you want your application be deployed.
SSH Configuration
I think there is no need to explain HOST and USERNAME. If you want use a normal user instead of root, refer to Create Sudo-Enabled User on Linux. If you currently have a user, you may need to disable the password prompt, see Step 4. sudo without password.
Then, the most important part comes to the SSH_PRIVATE_KEY. This allows GitHub action to be authenticated to access your server.
First, generate a SSH key pair on your PC (not the server). This is because we want to simulate a user login for GitHub action. And ed25519 algorithm is recommended. (You can choose RSA anyway.)
1 | ssh-keygen -t ed25519 |
It will generate id_ed25519 and id_ed25519.pub under ~/.ssh (Windows is %USERPROFILE%/.ssh) directory. The content of id_ed25519 is the SSH_PRIVATE_KEY. Then, we need to copy the public key to the server so that our private key will be authenticated.
1 | ssh-copy-id username@host |
For Windows users, there is an equivalent command combo to achieve this.
1 | cat ~/.ssh/id_ed25519.pub | ssh username@host "cat >> ~/.ssh/authorized_keys" |
In Windows, the EOL maybe CRLF, which will appear as ^M in Linux. You can edit authorized_keys manually after copy.
GitHub Action Secrets
Open your repository, and add HOST, USERNAME, SSH_PRIVATE_KEY and DEPLOY_PATH to your repository secrets.
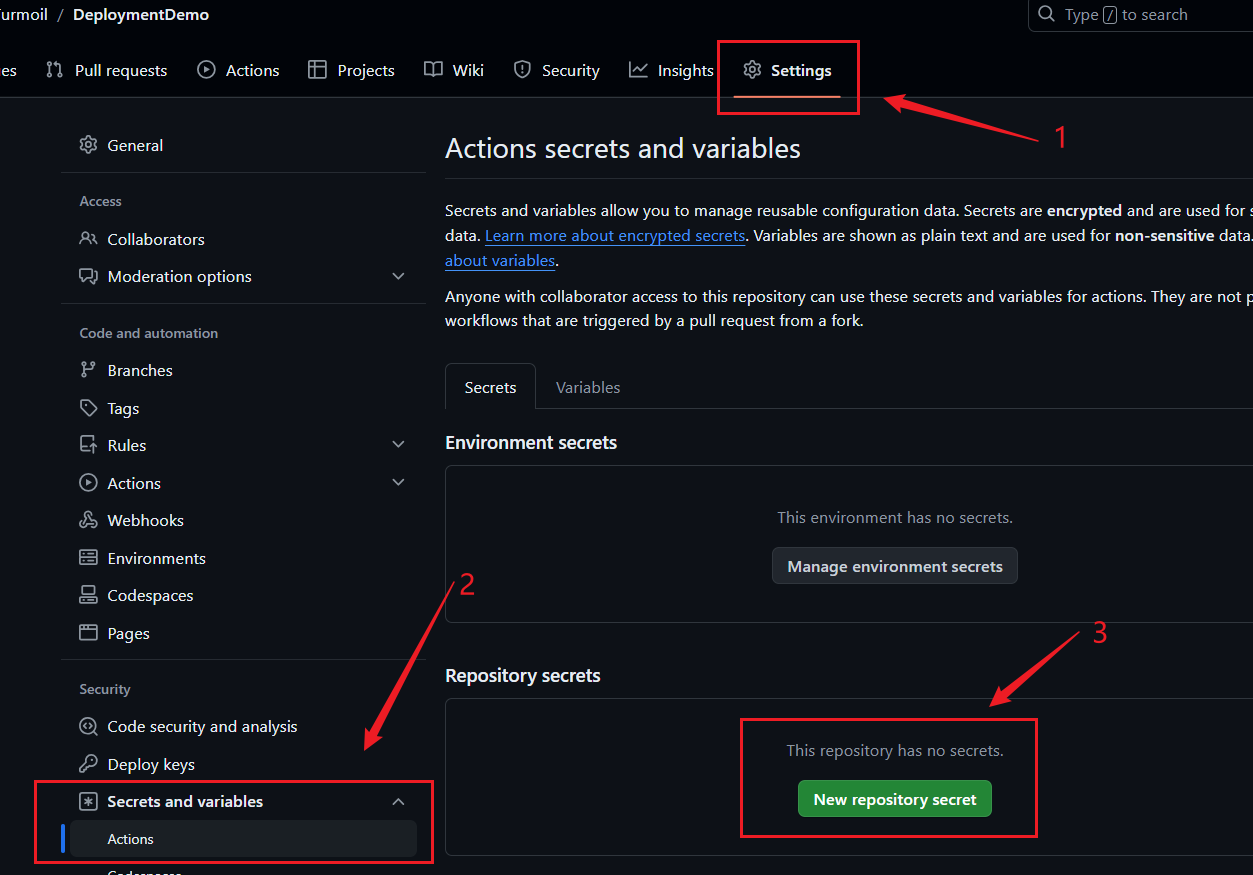
I suggest keep no new line at the end of secrets.
Trigger the Action
Everything is set, punch it! Push to the release branch and the action will run automatically.
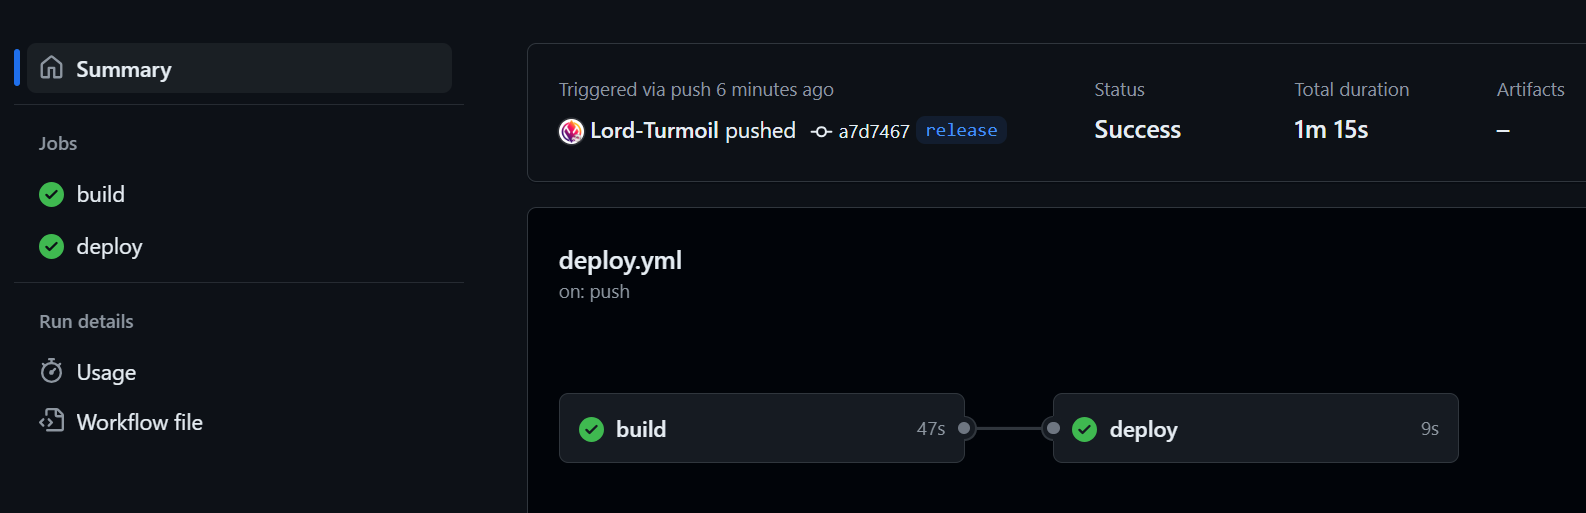
And on our server, we can check the deploy.log.
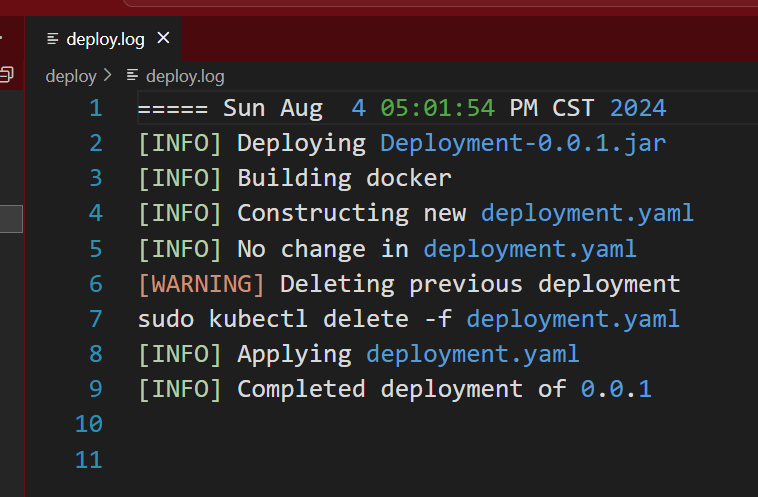
By using .log suffix, we can get a quite colorful highlighting in Visual Studio Code.😋
Tada!🎉Now your application can be deployed automatically, and you can get rid of the distractions to your development process.😆
Troubleshoot
Network issues
Unfortunately, docker is blocked by some “unknown” forces, so you may need some mirror. I suggest you go search for them in the GitHub, or use the container acceleration service by Aliyun.
1 | { |
After changing the mirror, restart docker service.
1 | sudo systemctl daemon-reload |
Unable to access port 80
After you solved the network issue, you may soon encounter another weird problem accessing port 80. Whatever your Nginx configuration is, it will always respond with 404 page not found in plain text (not the Nginx 404 page)! Even if you use curl localhost:80 on the server. What the?🤬How is this possible?
Put it simple, k3s uses traefik by default which alters iptables to dispatch requests. It has a higher priority so requests won’t make it to Nginx. It is not a mandatory service so everything works fine when we don’t have the mirror, because k3s won’t be able to pull the image.
Details
I tried to stop Nginx, though apparently not the cause, but the response remains. It means there is another service online. Then I tried lsof -i:80, but found nothing. I’m afraid there’s some sort of attack on me, so I checked all running processes. Well, I did find this: traefik. What a suspicious name, traffic, huh? Hijacked my requests?
Fortunately, it is not any virus. k3s will use traefik as the default router, which alters the system iptables. And since it uses iptables, we cannot find it via lsof. It will take over port 80 and 443 so any other services listening on these two ports will no longer work.🥲
But, why we don’t have such problem before? Because of the network issue, we’re unable to pull the traefix image without a mirror. Since it is not mandatory (unlike pause), so k3s will silently ignore it, therefore everything works fine. Now, with a mirror, k3s is able to pull all these images, and as a result,💥, 404 not found.
How ironic, the solution, is also, the poison. By the way, it seems only the pause service is required,
Below are two articles that inspired me, much thanks.🙏
To disable traefik, one should follow these steps.
Stop k3s
1 | sudo kubectl -n kube-system delete helmcharts.helm.cattle.io traefik |
Disable traefik in service configuration
Edit the k3s service at /etc/systemd/system/k3s.service, scroll to the bottom and add --disable=traefik option.
1 | ExecStart=/usr/local/bin/k3s \ |
Then, reload services.
1 | sudo systemctl daemon-reload |
It is optional to remove the traefik configuration file.
1 | sudo rm /var/lib/rancher/k3s/server/manifests/traefik.yaml |
Restart k3s service
Finally, start k3s and you won’t have the traefik service.
1 | sudo service k3s start |
Now, you’ll again have control over port 80 and 443.
By the way, K3s enables many components which may not be required, so you can just disable them all. See the official document here.
1 | ExecStart=/usr/local/bin/k3s \ |
Epilogue
I think it is one of the longest post I have? This is the most comprehensive summary of my deployment experience so far, and I hope it could be useful for me, and of course for you.😆Before, I was a little bit dismissive of Docker, but now, I am impressed by its portability and ease of use. It’s really convenient for scalable deployment.
But I am still NOT going to install Docker Desktop on my Windows PC!😠
Well, I guess this is it? See you around. ᓚᘏᗢ